Massey Ferguson 135 Restoration
'I'm a member of a model flying club which owns a 1968 MF135 which we use mainly for grass cutting and for other jobs around the field with a front loader. We also maintain our access lane with a box blade which we bought a year or so ago with impressive results.
Last year, we decided to change the front tyres on the tractor to some less aggressive than the common 3 rib type which were cutting gouges out of our grass runways. While putting the newly shod wheels onto the tractor, I noticed a large amount of play in the kingpins.
While hardly likely to cause the tractor to wobble off the field during hard cornering, leaving wear like this would eventually lead to damage beyond “simple” replacement of bushes so I volunteered to whip it apart and change them – a couple of hours work? I ordered the bushes and discovered that they would need reaming to size after fitting so started a search for the necessary tool, much larger than my own selection of fixed and adjustable reamers. We decided to wait until the grass growing season was over and once I'd tracked down a suitable reamer it was just a case of hanging on for the tractor to be available for a couple of days.
I noticed that the whole front axle beam seemed to move rather a lot more than looked desirable so after removing the wheels and kingpin assemblies I dismantled the centrally pivoted axle beam and found the pivot pin very badly worn.
PICTURE 1 - The axle beam pivot pin
After advising the rest of the committee about my findings (which included condemning the kingpins which I'd hoped rather optimistically that I'd find to be serviceable by reaming the bushes to accommodate some inevitable wear) I ordered new kingpins and axle beam pivot parts (including an uprated single piece bush) from Anglo Agriparts and set about the task of removing the old bushes. The parts arrived very promptly and were well packed.
PICTURE 2 - One of the kingpins - the rough dark areas top and bottom are the bearing surfaces!
As I'm reasonably equipped for amateur automotive engineering, I took the parts home to press out the various worn bushes - should be a doddle with my home built 10 ton hydraulic press...
PICTURE 3 - The axle beam pivot bush - the bearing had almost worn through to the housing.
I found some appropriate adapters and started pumping until the handle started to bend visibly. Not a sign of movement so I applied heat and tried again - and again - and again, with some judicious tapping with a heavy hammer, all washed down with lashings of penetrating oil. Still nothing. Right, I'll weaken the bushes by cutting through them carefully with a hacksaw. Where did the teeth go? The steel was glass hard. Luckily, I have a Permagrit hacksaw blade and I eventually cut through far enough for the bushes to crack and with the aid of a large hammer, I was able to get a few thousandths of an inch movement which I worked back and forward a couple of times. Back to the press and it came out using the full capability of the ram. Phew!
PICTURE 4 - The axle beam (two part) pivot bush after extraction with saw cuts visible – along with a couple of old kingpin bushes.
By this time, constant juggling in and out of the vice and on and off of the press of the 32 lb lump of steel had made my arms ache (I must be getting old!) so I called it a day. Next morning, I set about the easy task of knocking out the kingpin bushes. Except when I looked, they were almost the same size as the internal bore of the housing so there was little to get any purchase on. The manual showed use of a special tool - but showed no detail of how it worked. Some further thought allowed me to devise a plan and I fired up my lathe to make a split bush to use in conjunction with some extractor tools I'd saved from the scrapman when the vehicle fleet workshops at my old work headquarters had closed. While very awkward to position the two halves in situ inside the housing while holding the weight of the extractor, it worked very successfully once assembled.
PICTURE 5 - Home made bush extractor showing battle scars after the last bearing was out.
Pulling the new bushes in was fairly straight forward once I'd worked out some adaptors that allowed enough thread on the extractor to come through the housing (the distance was fractionally too long to use my press - designed around a length of I beam I acquired to build it from) and I decided to see how much metal would need to be removed from the bushes with the reamer to get a good fit. Did I mention that I'd spent a couple of hours making an extension to the reamer pilot shaft before Christmas? Guess what - the kingpins were a perfect fit! Despite confirming with both the Massey Ferguson manual and the supplier that the bushes would need reaming, it seems that they must have supplied pre-sized bushes! As it had taken a couple of months or more to find a suitable reamer at a reasonable price and various enquiries about getting the bushes sized had drawn a blank, it wasn't something that we could have chanced without risking the tractor being out of commission for an extended time.
PICTURE 6 - Kingpin bush replacement.
As the next day was Thursday and of course mostly reserved for flying, I confined myself to pressing in the axle beam pivot bush and removing the wheel hubs from the old kingpins.
PICTURE 7 - Pressing the new one piece pivot bush into the beam axle.
The remaining work before returning the parts to the tractor was the straightforward but messy job of cleaning out the wheel bearings, repacking the wheel hubs with grease and reassembling them to the new kingpin/axle assemblies. A lovely morning dawned on the following Monday so I gathered the prepared parts and my tools and headed to the club.
PICTURE 8 - The new and refurbished parts awaiting fitting.
Reassembly was straightforward and the tractor was once again sitting on all four wheels with fresh grease exuding from the bushes. Who knows how long the old ones lasted but it's certainly more than 20 years since the club bought the tractor, which celebrated its fiftieth birthday last year. I'm rather hoping that these parts will not need replacing while I'm still a member! .'
Fantastic pictures Martin - it's great to see another Massey classic being brought back to life.
Share details of your tractor repair or restoration to claim a free beanie, mug or t-shirt. Just send us your story with a couple of pics to: joanne@anglo-agriparts.com (Please include which item you would like us to send; a beanie, coffee cup or T shirt - plus your size L, XL, XXL). Unfortunately due to shipping costs we can only send to UK addresses. Your images will be shared on our website, social media and may be used to promote Anglo Agriparts.
View Massey Ferguson 135 parts>>>
 1
1 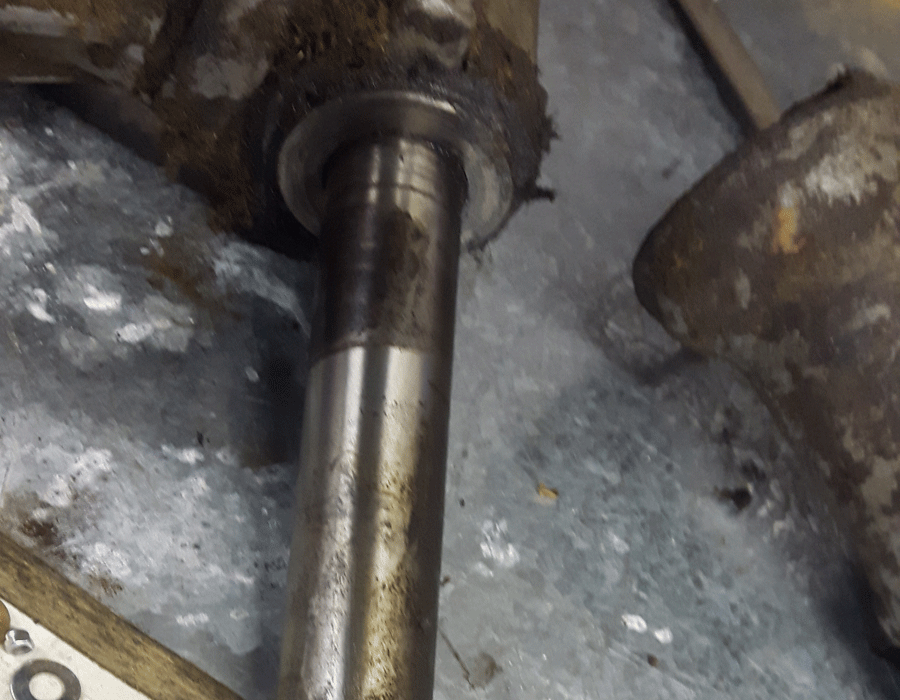 2
2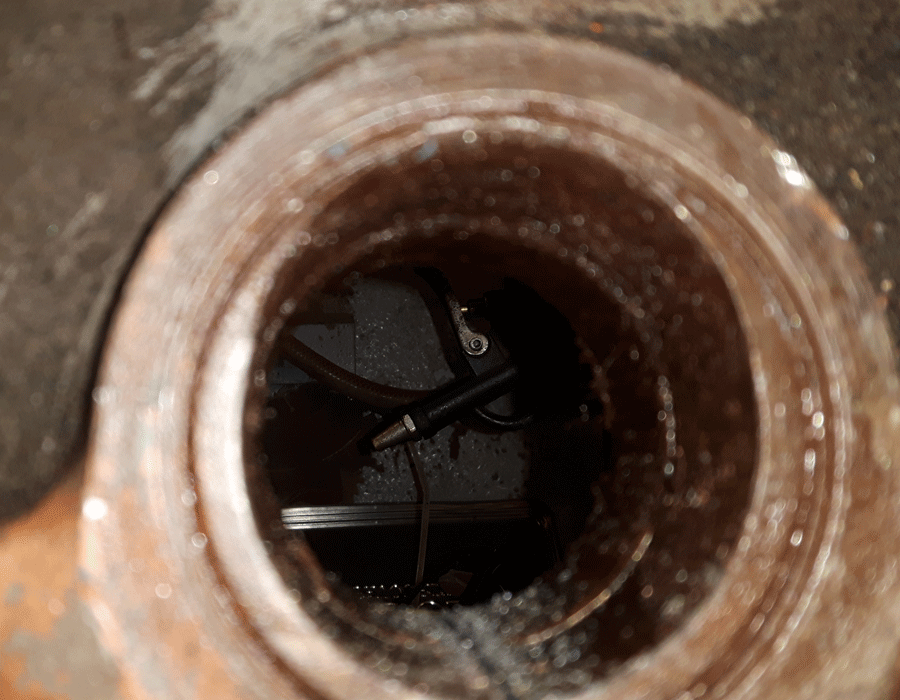 3
3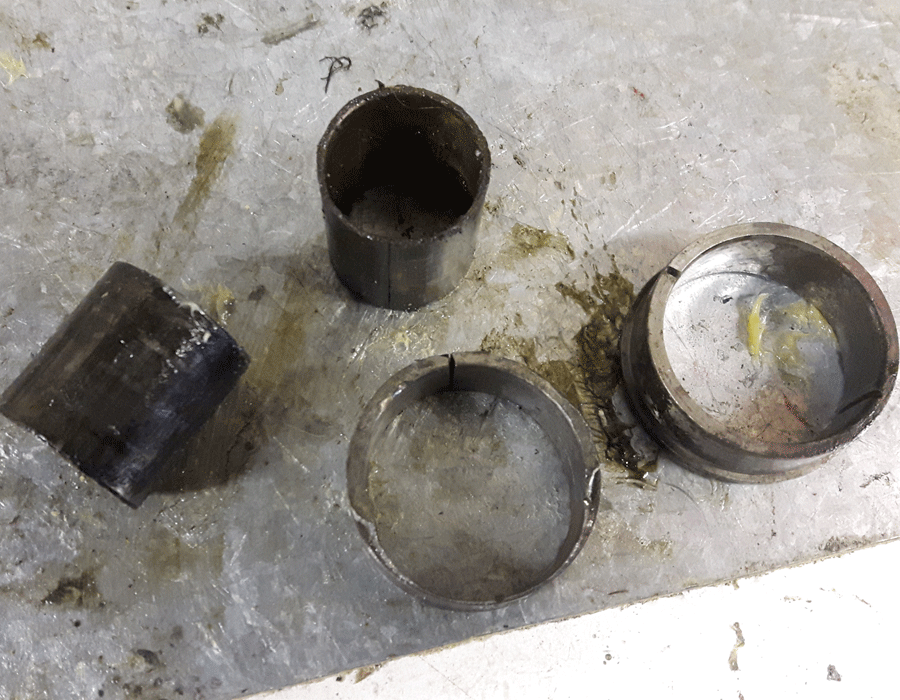 4
4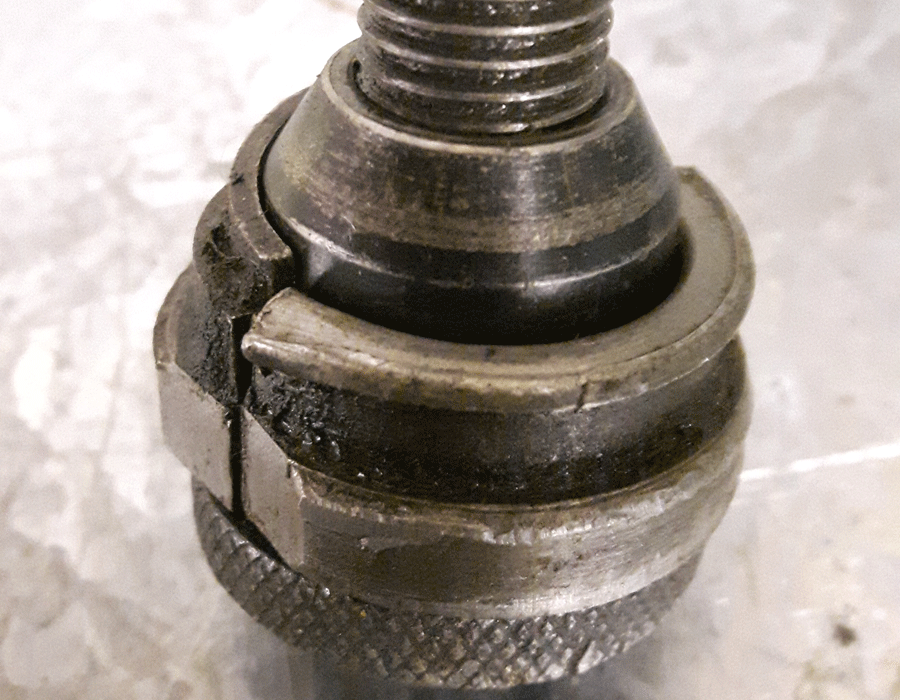 5
5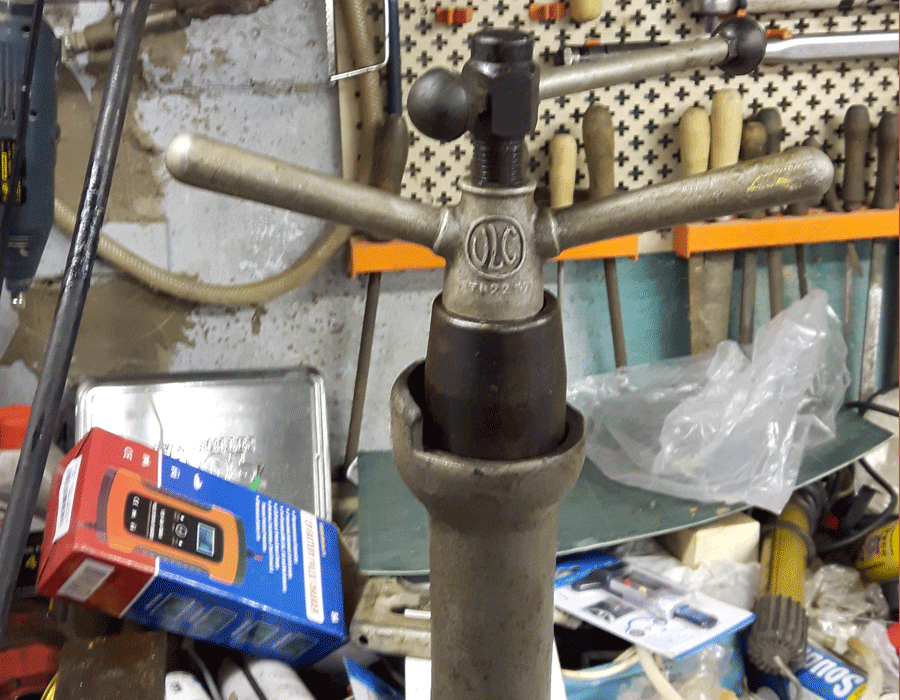 6
6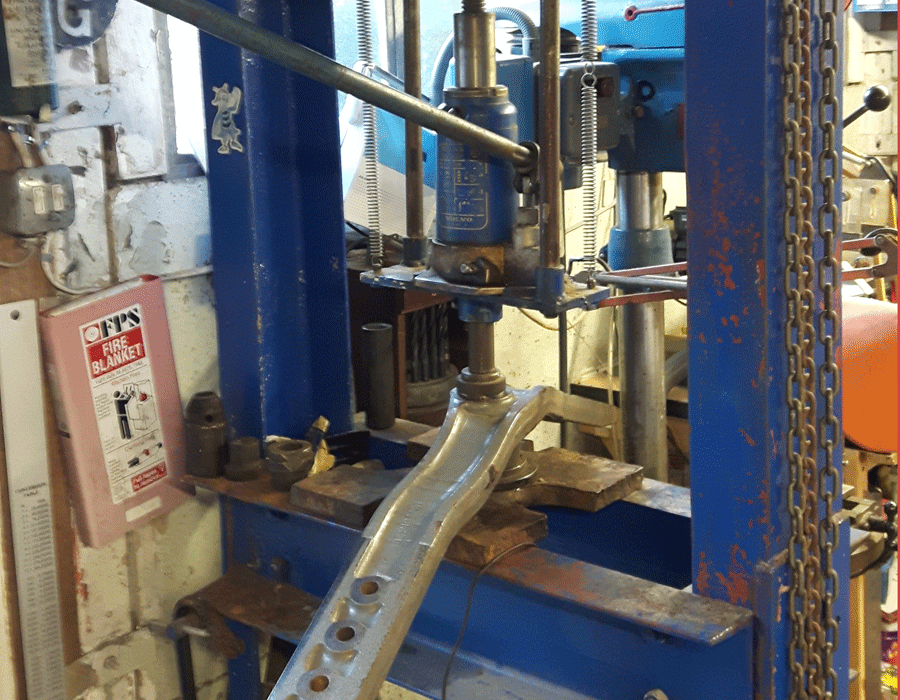 7
7 8
8


Related Products


Tags massey 135, massey ferguson 135, massey ferguson, kingpin, bush, axle,