International Harvester 434 Major Works Part 6 - Cam Shaft

International Harvester 434 Major Works Part 6 - Camshaft
The camshaft and cam followers (tappets) are often ignored during an engine rebuild. On the IH B144 and B154 engines (H B250, B275, B414, 276, 434, 444 etc.) these are generally trouble free but this article explains ways to check them. It also explains how to change the gear or adjust the end float should this be necessary.
This photograph shows the gear, retaining plate, woodruff key and camshaft disassembled.
The gear is a press fit onto the end of the camshaft and located by the woodruff key for correct timing.
The retaining plate fits between the gear and the first camshaft bearing journal (the larger diameter top-right of the photograph) and needs to have the correct clearance to allow free running but not too much end float. The clearance can be easily measured with a feeler gauge and should be in the range 8 to 17 thou. If this is incorrect, the gear can be pressed further onto the camshaft to compensate for wear. Too much end float will allow the camshaft to move longitudinally and, as the gears are helically cut, this will affect the valve timing and could also lead to gear rattle.
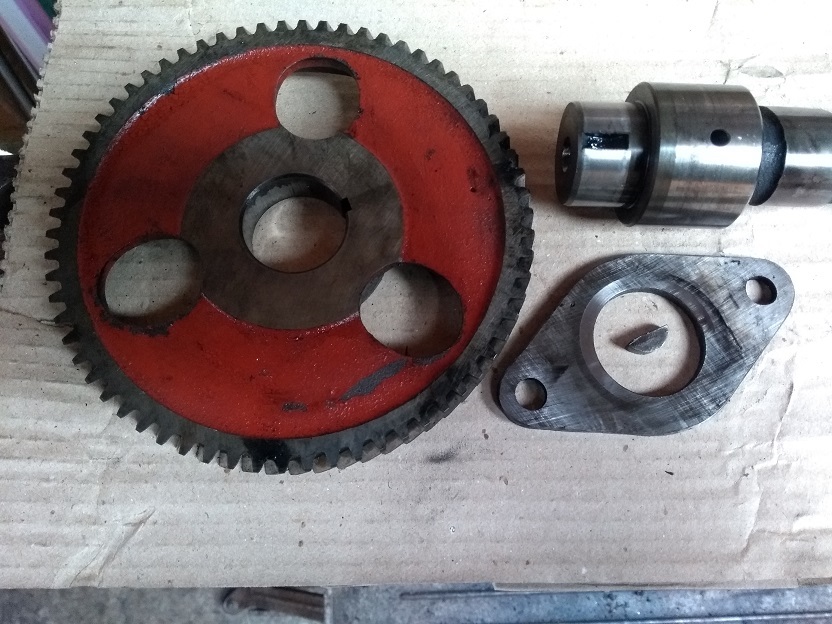
Two bolts through the retaining plate hole the camshaft in place, but with the standard gear’s three holes, the camshaft has to be rotated to remove one bolt at a time.
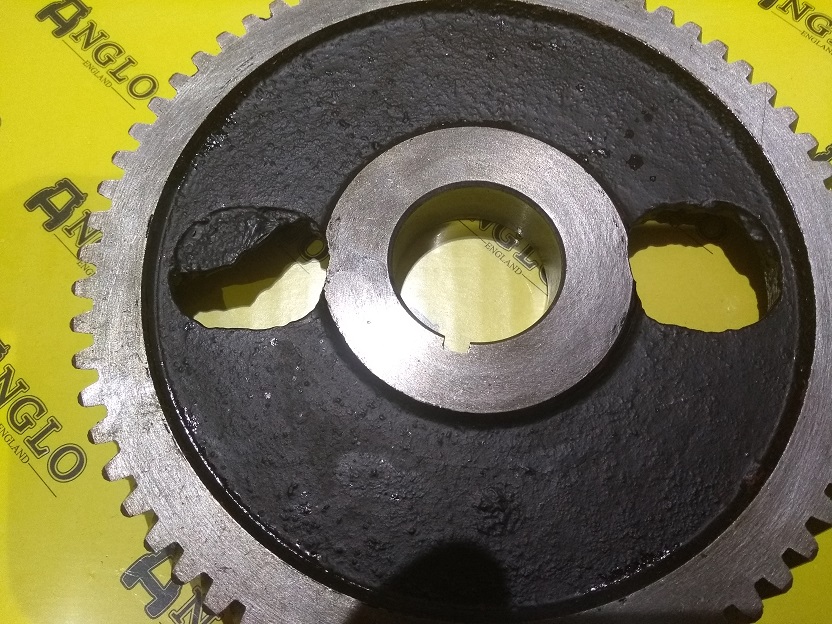
This engine required a new gear. This is a photograph of the replacement gear supplied by Anglo (A90621). As can be seen it looks quite different to the red three-hole part fitted originally and shown on the website but is a direct replacement. As it has two holes it is actually easier to install or remove the camshaft as both bolts are accessible at the same time.
Unfortunately, and as can be seen in the photograph, there was moulding flash in both holes. Anglo has been notified so hopefully other gears will not have this issue. Both holes were cleaned up with a carbide burr in the drill. Aside from this minor point the gear was well mode with nicely machined bore and keyway.
Removing the old gear simply involves supporting the gear in a press and pushing the camshaft out. Fitting a new gear requires the camshaft to be supported while the gear is pressed onto the camshaft. I use V blocks supporting the first bearing journal – don’t just support on the opposite end of the camshaft as the press could bend it. Check the retaining plate clearance while pressing the gear on and stop when it is in tolerance.
My small 6 tonne press had no difficulty with this task. It may even be possible to do the job with a gear puller, but I haven’t tried.
Inspection and Measurement
Assuming the camshaft visually looks ok then the engine will probably run without problems. This particular engine was very badly worn so I wanted to check is the camshaft was still in specification. There are a couple of ways to check the camshaft – between centres or while still in the engine.
Checking Between Centres
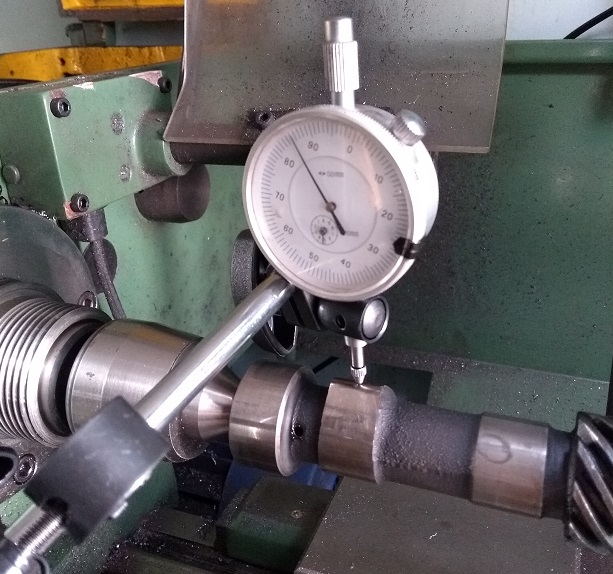
Assuming a suitable sized lathe is available, the simplest way to check the camshaft is as shown in this photograph where it is mounted between two rotating centres (the second is in the tailstock just to the right of the gear).
The bearing journals can be checked for wear with a micrometer and should be:
- Front 1.811/1.812”
- Centre 1.577/1.578”
- Rear 1.499/1.500”
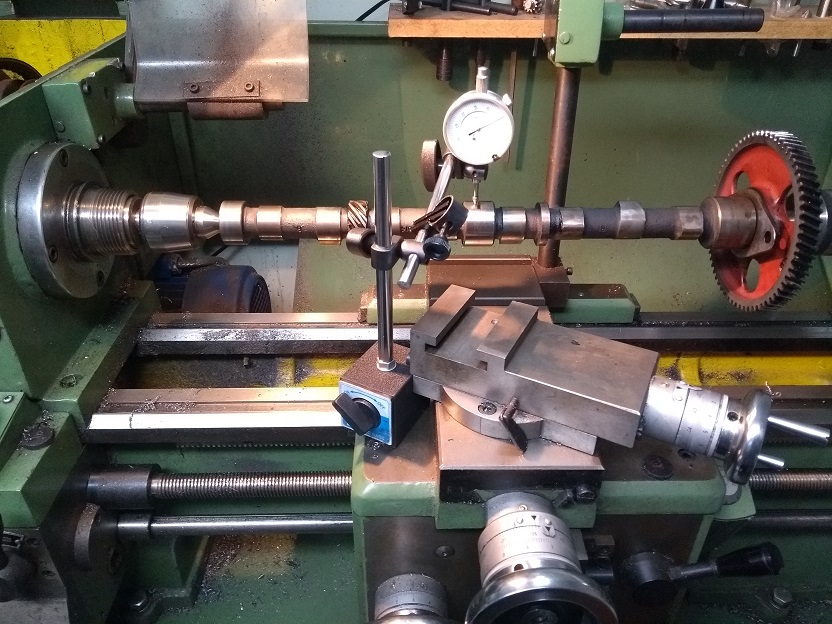
With a dial indicator on each journal, rotate the camshaft to confirm that it isn’t bent – very unlikely but if you’re going to use a reclaimed part this could be an issue.
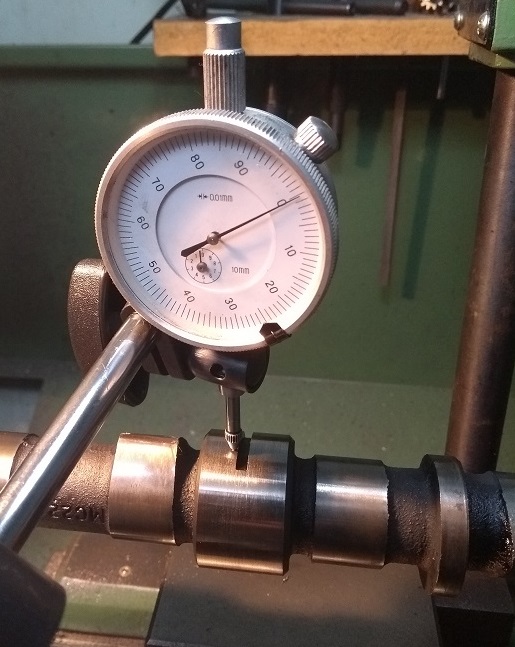
The cam lift can be measured using a dial indicator resting on the cam. For each cam in turn, rotate the camshaft to find the lowest point and zero the dial. Rotate the camshaft to find the highest point and the reading will now be the cam lift.
The specified tolerances are:
- Inlet 0.2175/0.2195”
- Exhaust 0.1955/0.1975”
On this engine the camshaft was still just within tolerance but, as so many other parts needed replacing, I decided to fit a new one to ensure maximum future engine life. The same Anglo replacement (A42083) fits BD144 and BD154 diesel and BC144 petrol engines. The replacement seemed to be of high quality and I had no issues with it.
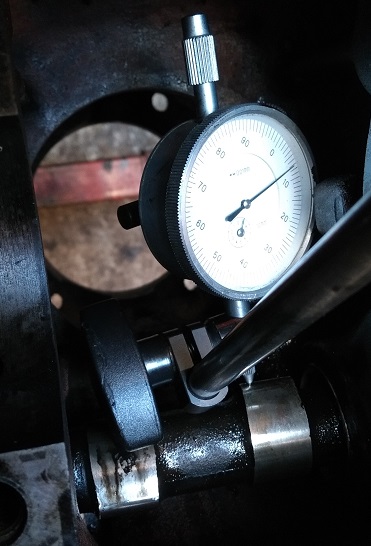
Checking In Engine
Checking the camshaft lift while in the engine is possible… but not that easy to photograph!
With the liners removed it is possible to mount a dial indicator to measure the cam lift in essentially the same way as described when between centres in a lathe. It isn’t however as convenient.
If the liners are still in place then it may be possible to measure from the top of a pushrod (or even the rocker arm), although I haven’t tried this. The pushrod may need some support to ensure accurate readings.
The next article will cover the connecting rod small end bush, how to measure and replace if necessary.
ARTICLE CONTRIBUTED BY ANDREW CHAPMAN
© ANDREW CHAPMAN & ANGLO AGRIPARTS LTD


Licence Terms
You are free to: Share, copy & redistribute the material in original format for any purpose as long as you follow the license terms below:
- Attribution – you must give appropriate credit and provide a link to the original article in a reasonable and visible manner
- You may not in any way suggest that the licensor endorses you or your use.
- No Derivatives – The material must be distributed in full, including disclaimer, you may not distribute or share modified material.
- No additional restrictions – You may not apply legal terms that legally restrict others from doing anything the licence permits.
- No warranties are given. The license may not give you all of the permissions necessary for your intended use. For example other rights such as publicity, privacy, or moral rights may limit how you use the material.
Disclaimer

Related Articles


Ferguson TED20 - Fitting the Camshaft Video Tutorial
Gordon's TED20 restoration continues - in this video Gordon & Oscar install the camshaft - a critical component in your tractors engine.

International Harvester 434 Major Works Part 7 - Small End Bush
The connecting rod small end bush is an often overlooked area when rebuilding an engine. In his latest article in the series, contributor Andrew looks at how to achieve close tolerance fits between parts on his International Harvester 434.
-200x200.png "International Harvester 434 Major Works Part 9 - Crankshaft")
International Harvester 434 Major Works Part 9 - Crankshaft
This article describes the installation of the crankshaft, main and big-end shells in an International Harvester 434.