International Harvester 434 Major Works Part 3 - The Oil Filter That Didn't

International Harvester 434 Major Works Part 3 - The Oil Filter That Didn't
Didn’t what? An oil filter is meant to filter oil and this engine didn’t filter oil at all.
As the problem had clearly existed for a long time without detection, an explanation seemed worthwhile as other engines could have the same problem.
This particular engine was both the dirtiest internally and with the greatest amount of wear of any engine that I’ve ever worked on. The problem with the filter had clearly existed for many years without being noticed (including by me) and was a major contributor to the wear.
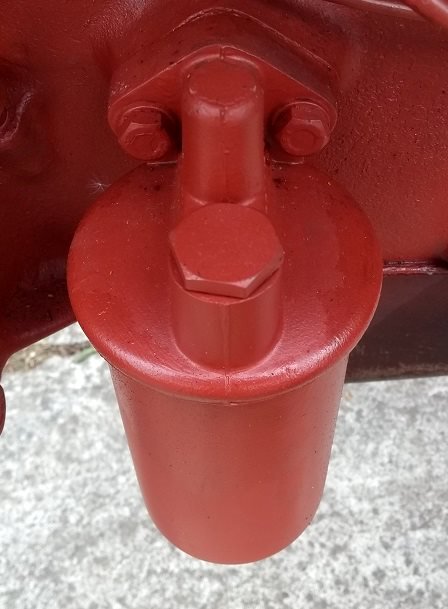
The engine in question was the BD154 on my International Harvester 434. This style of replaceable paper cartridge is used on many different engines so the information could be of general interest.
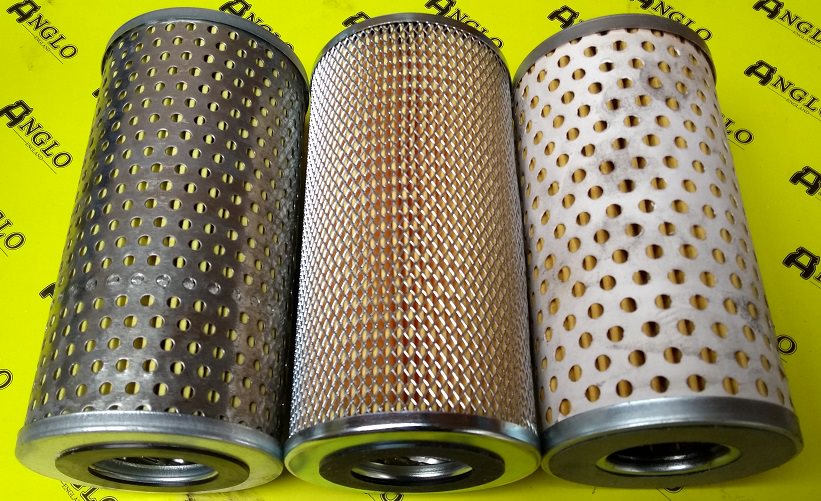
The filter cartridges are available from many different suppliers – there three are ones that I had in stock and are direct equivalents.
Anglo’s part number for this filter is A59352 which is the one on the right.
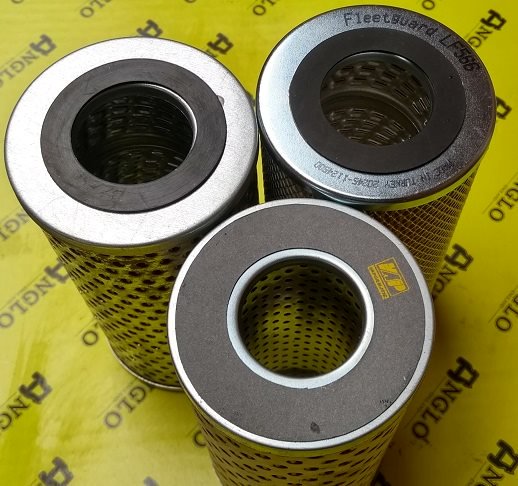
These are the same cartridges showing the sealing disk on the end. A similar seal is on the other end and so they can fit either way up.
There are three different types of filter unit fitted to the IH tractors, probably based on supply availability and price. My engines have the Purolator type
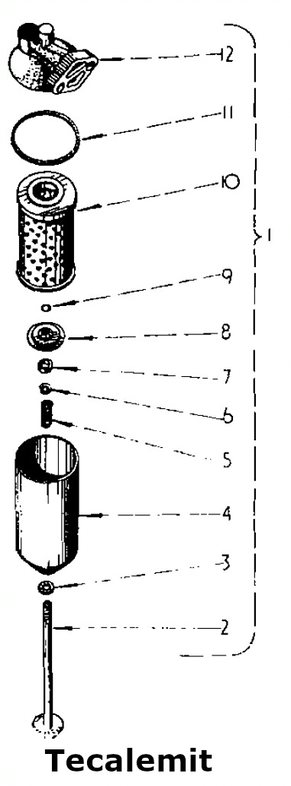
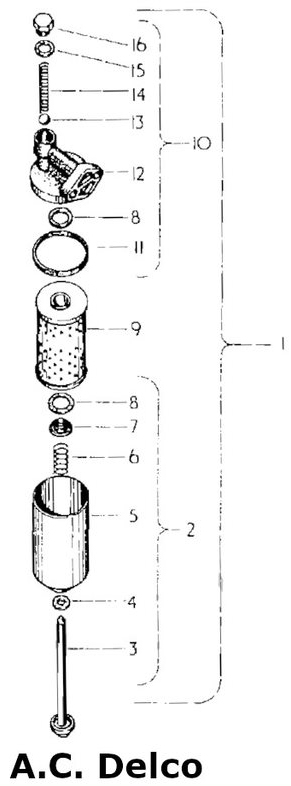
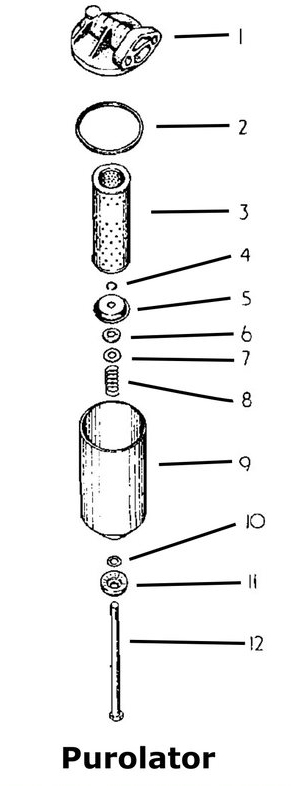
All three types work in essentially the same way so the following description uses the numbering from the Purolator type.
Oil is delivered from the pump, through the head (1) into the filter’s sump (9), through the element (3) and then back through the head to all the parts of the engine needing lubrication.
The head includes a pressure relief valve which can be dismantled for the A C Delco version but not for the others. The relief valve stops excess pressure building up across the element as this could damage it. As the element becomes dirty, more and more oil will therefore not be filtered… so change filters at the recommended intervals!
The sealing ring (2) fits into the head (1) to provide a seal with the sump (9). Normally several different sizes are included with new elements so the correct size one needs selecting. While it isn’t necessary to replace these every time, they should be replaced regularly to stop leaks. Similarly there is a seal (10) to stop oil leaking from the fixing bolt (12), but these aren’t normally included with the element so if there is a leak from this area a suitable O-ring or rubber washer will be needed.
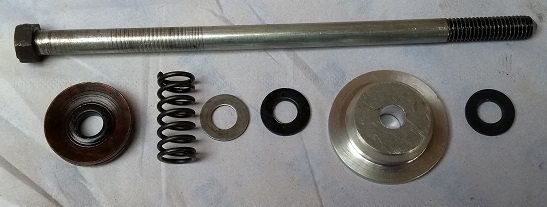
As the filter element is a hollow tube, it needs to be sealed at both ends. The top presses against the underside of the head. The bottom seal is more complex in that there is a spring (8), washer (7), seal (6), element guide (5) and circlip (4).
The spring pushes the element guide (5) against the seal on the bottom of the element (3) to ensure that the oil flows through the element… but that wasn’t happening on my engine! The element guide and circlip were both missing – presumably the circlip had fallen of at some stage, the element guide stuck to the element and had subsequently been thrown away. I’d done at least two oil changes on the engine without noticing that it was missing as the bolt, spring washer and seal were still in place and I’ve tended to just tip the old element out and drop a new one in.
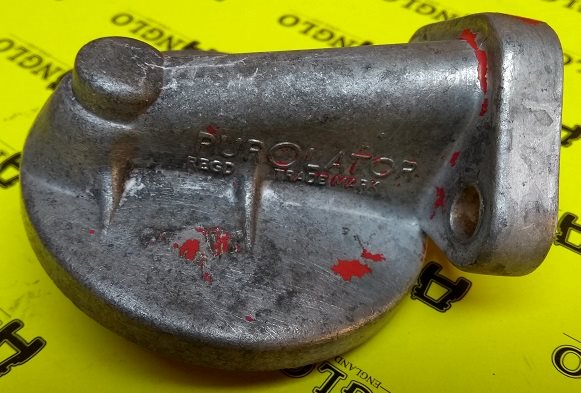
This is the head of the Purolator unit.
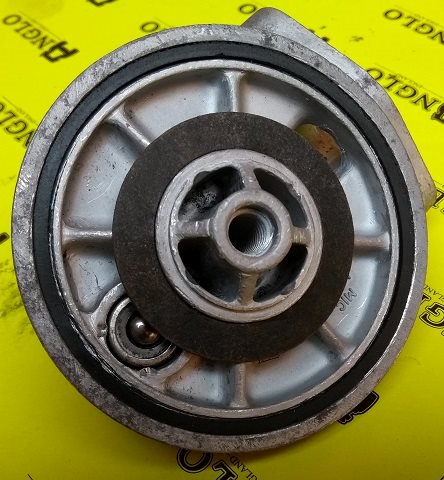
This view of the underside of the same unit shows the sealing ring (2) and a washer that seals against the top of the element.
In the bottom left of the picture is a ball bearing which is part of the pressure relief valve.
This picture shows the retaining screw and associated parts. No O-ring (10) was fitted so I’ll have to find something when it is re-assembled. As the element guide was missing and I had no reference model to work from, I made a replacement from a piece of aluminium that I had around to replace the original pressed metal part.
Interestingly there was no groove for the (missing) circlip (4) so I’ve used a rubber washer for the first trial but finally fitted a circlip into the end of the thread.
So the moral of this tale is “CHECK THAT YOUR FILTER WILL ACTUALLY WORK”.
ARTICLE CONTRIBUTED BY ANDREW CHAPMAN
© ANDREW CHAPMAN & ANGLO AGRIPARTS LTD


Licence Terms
You are free to: Share, copy & redistribute the material in original format for any purpose as long as you follow the license terms below:
- Attribution – you must give appropriate credit and provide a link to the original article in a reasonable and visible manner
- You may not in any way suggest that the licensor endorses you or your use.
- No Derivatives – The material must be distributed in full, including disclaimer, you may not distribute or share modified material.
- No additional restrictions – You may not apply legal terms that legally restrict others from doing anything the licence permits.
- No warranties are given. The license may not give you all of the permissions necessary for your intended use. For example other rights such as publicity, privacy, or moral rights may limit how you use the material.
Disclaimer
-500x500.png "International Harvester 434 Major Works Part 3 - The Oil Filter That Didn't")
Related Articles

Air, Oil, Fuel Filters For Your Tractor
Air filters are designed to prevent debris from entering the engine's cylinders, where it would cause mechanical wear and oil contamination. Without an air filter in place, the engine may also be sucking dirt and debris in at the same time. This can cause damage to internal engine parts, such as valves, pistons and cylinder walls.

International Harvester 434 Major Works Part 1 – Initial Strip-down
Contributor Andrew Chapman undertakes a major overhaul of his International Harvester 434. Part 1 is discusses the initial strip down of the tractor in preparation of the work.

International Harvester 434 Major Works Part 2 - Cylinder Head Overhaul
Contributor Andrew Chapman undertakes a major overhaul of his International Harvester 434. In part 2 he covers the cylinder head and valve overhaul.

Ferguson TED20 - Rebuilding the Oil Pump - Video Tutorial
The latest installment from Gordon and Oscar of the restoration of their Ferguson TED20. This video focusses on the oil pump which circulates engine oil to the rotating bearings, the sliding pistons and the camshaft of the engine. This circulation under pressure lubricates the bearings and aids the cooling of the engine.

Ferguson TED20 - Oil Filter & Timing Cover - Video Tutorial
The latest installment from Gordon and Oscar covers a few outstanding jobs: reassembling the oil filter head and replacing the oil seal on the timing cover on their Ferguson TED20.

International Harvester 434 Major Works Part 4 - Strip, Clean & Initial Inspection
In Andrew's latest article he focusses on the stripping, cleaning and initial inspection of the various components fitted to the engine block on his International Harvester 434.
-200x200.png "Ferguson TED20 - Fitting the Oil Filter Housing - Video Tutorial")
Ferguson TED20 - Fitting the Oil Filter Housing - Video Tutorial
Common signs of failed oil filter housing and a video tutorial on how to fit a replacement oil filter housing unit on your tractor with Gordon from Waterhouse Forde.