Tractor Steering Overhaul Part 2

Steering Overhaul Part 2 – Steering Knuckles and Hubs
This article is based on rebuilding the steering knuckles and hubs on Bradford built International Harvester B275, B414 and 434 tractors. The design of the parts are however similar to those on many tractors of the period and so should be of general use.
The Bradford tractors use two main styles of front axle consisting of a central swinging beam with a pair of axle extensions fitting in the ends and providing a means of track width adjustment. The B275 has the round axle type while the B414 and 434 have the square type. My B275 axle was so heavily rusted together that it proved impossible, even with heat from oxy-acetylene to separate but the other two eventually came apart. While the axles differ, the steering knuckles and hubs are interchangeable although there were design changes over the years.
Basic Strip-down
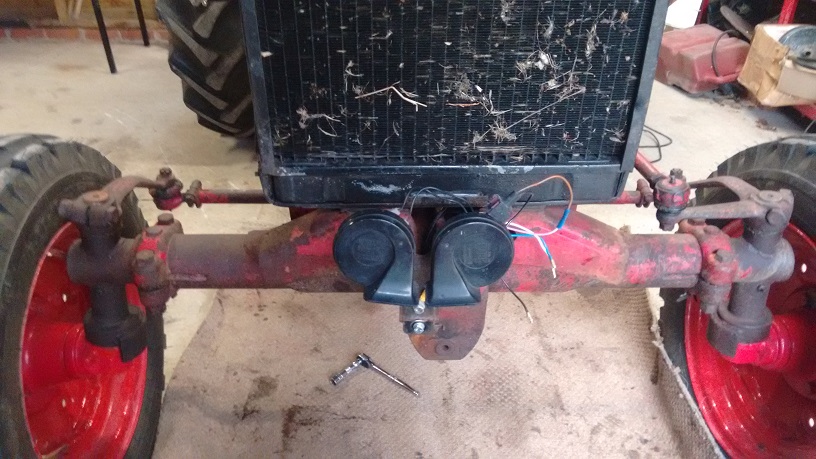
If this overhaul is part of a full front axle restoration then more of the tractor may need to be dismantled, but if only work is being carried out on the steering knuckles and/or hubs then preparation is primarily slackening wheel nuts then supporting the front axle on axle stands.
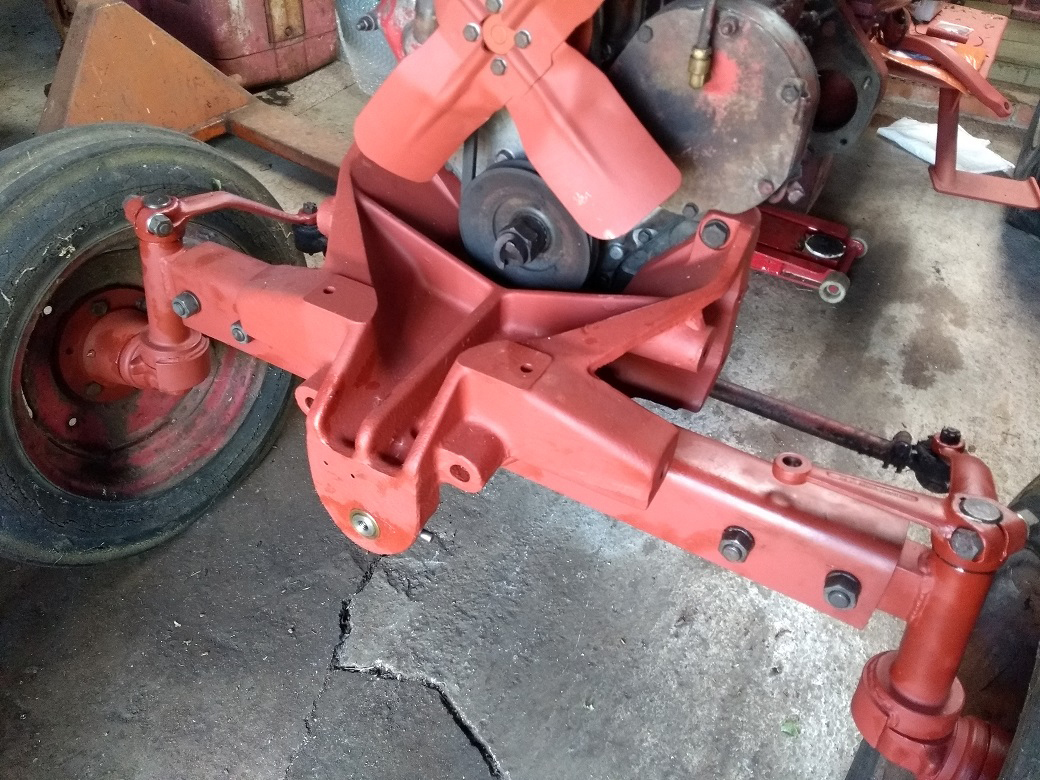
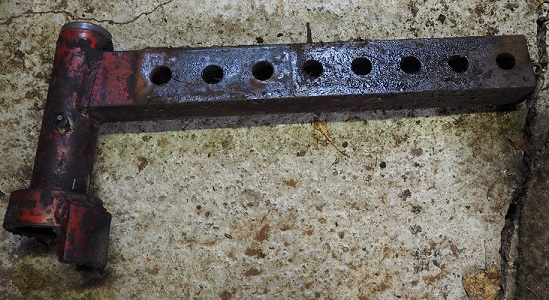
Alternatively one can remove the bonnet, radiator and front drag link joint, support the bulk of the tractor then remove the 4 bolts holding the tombstone to the engine. This frees the front wheels - the axle and tombstone (best supported with an engine crane or similar) can then be rolled away as a unit. This is basically everything in primer (excluding the fan) in this photograph of a B414.
This photograph is an example of the later square section front axle and is the same design on the 434 and others in the range.
The axle extensions are held in place by two special bolts which can be difficult to remove - more on this later.
This photograph shows the same axle inverted and positioned over the tombstone (the front mounting casting) ready for reassembly.
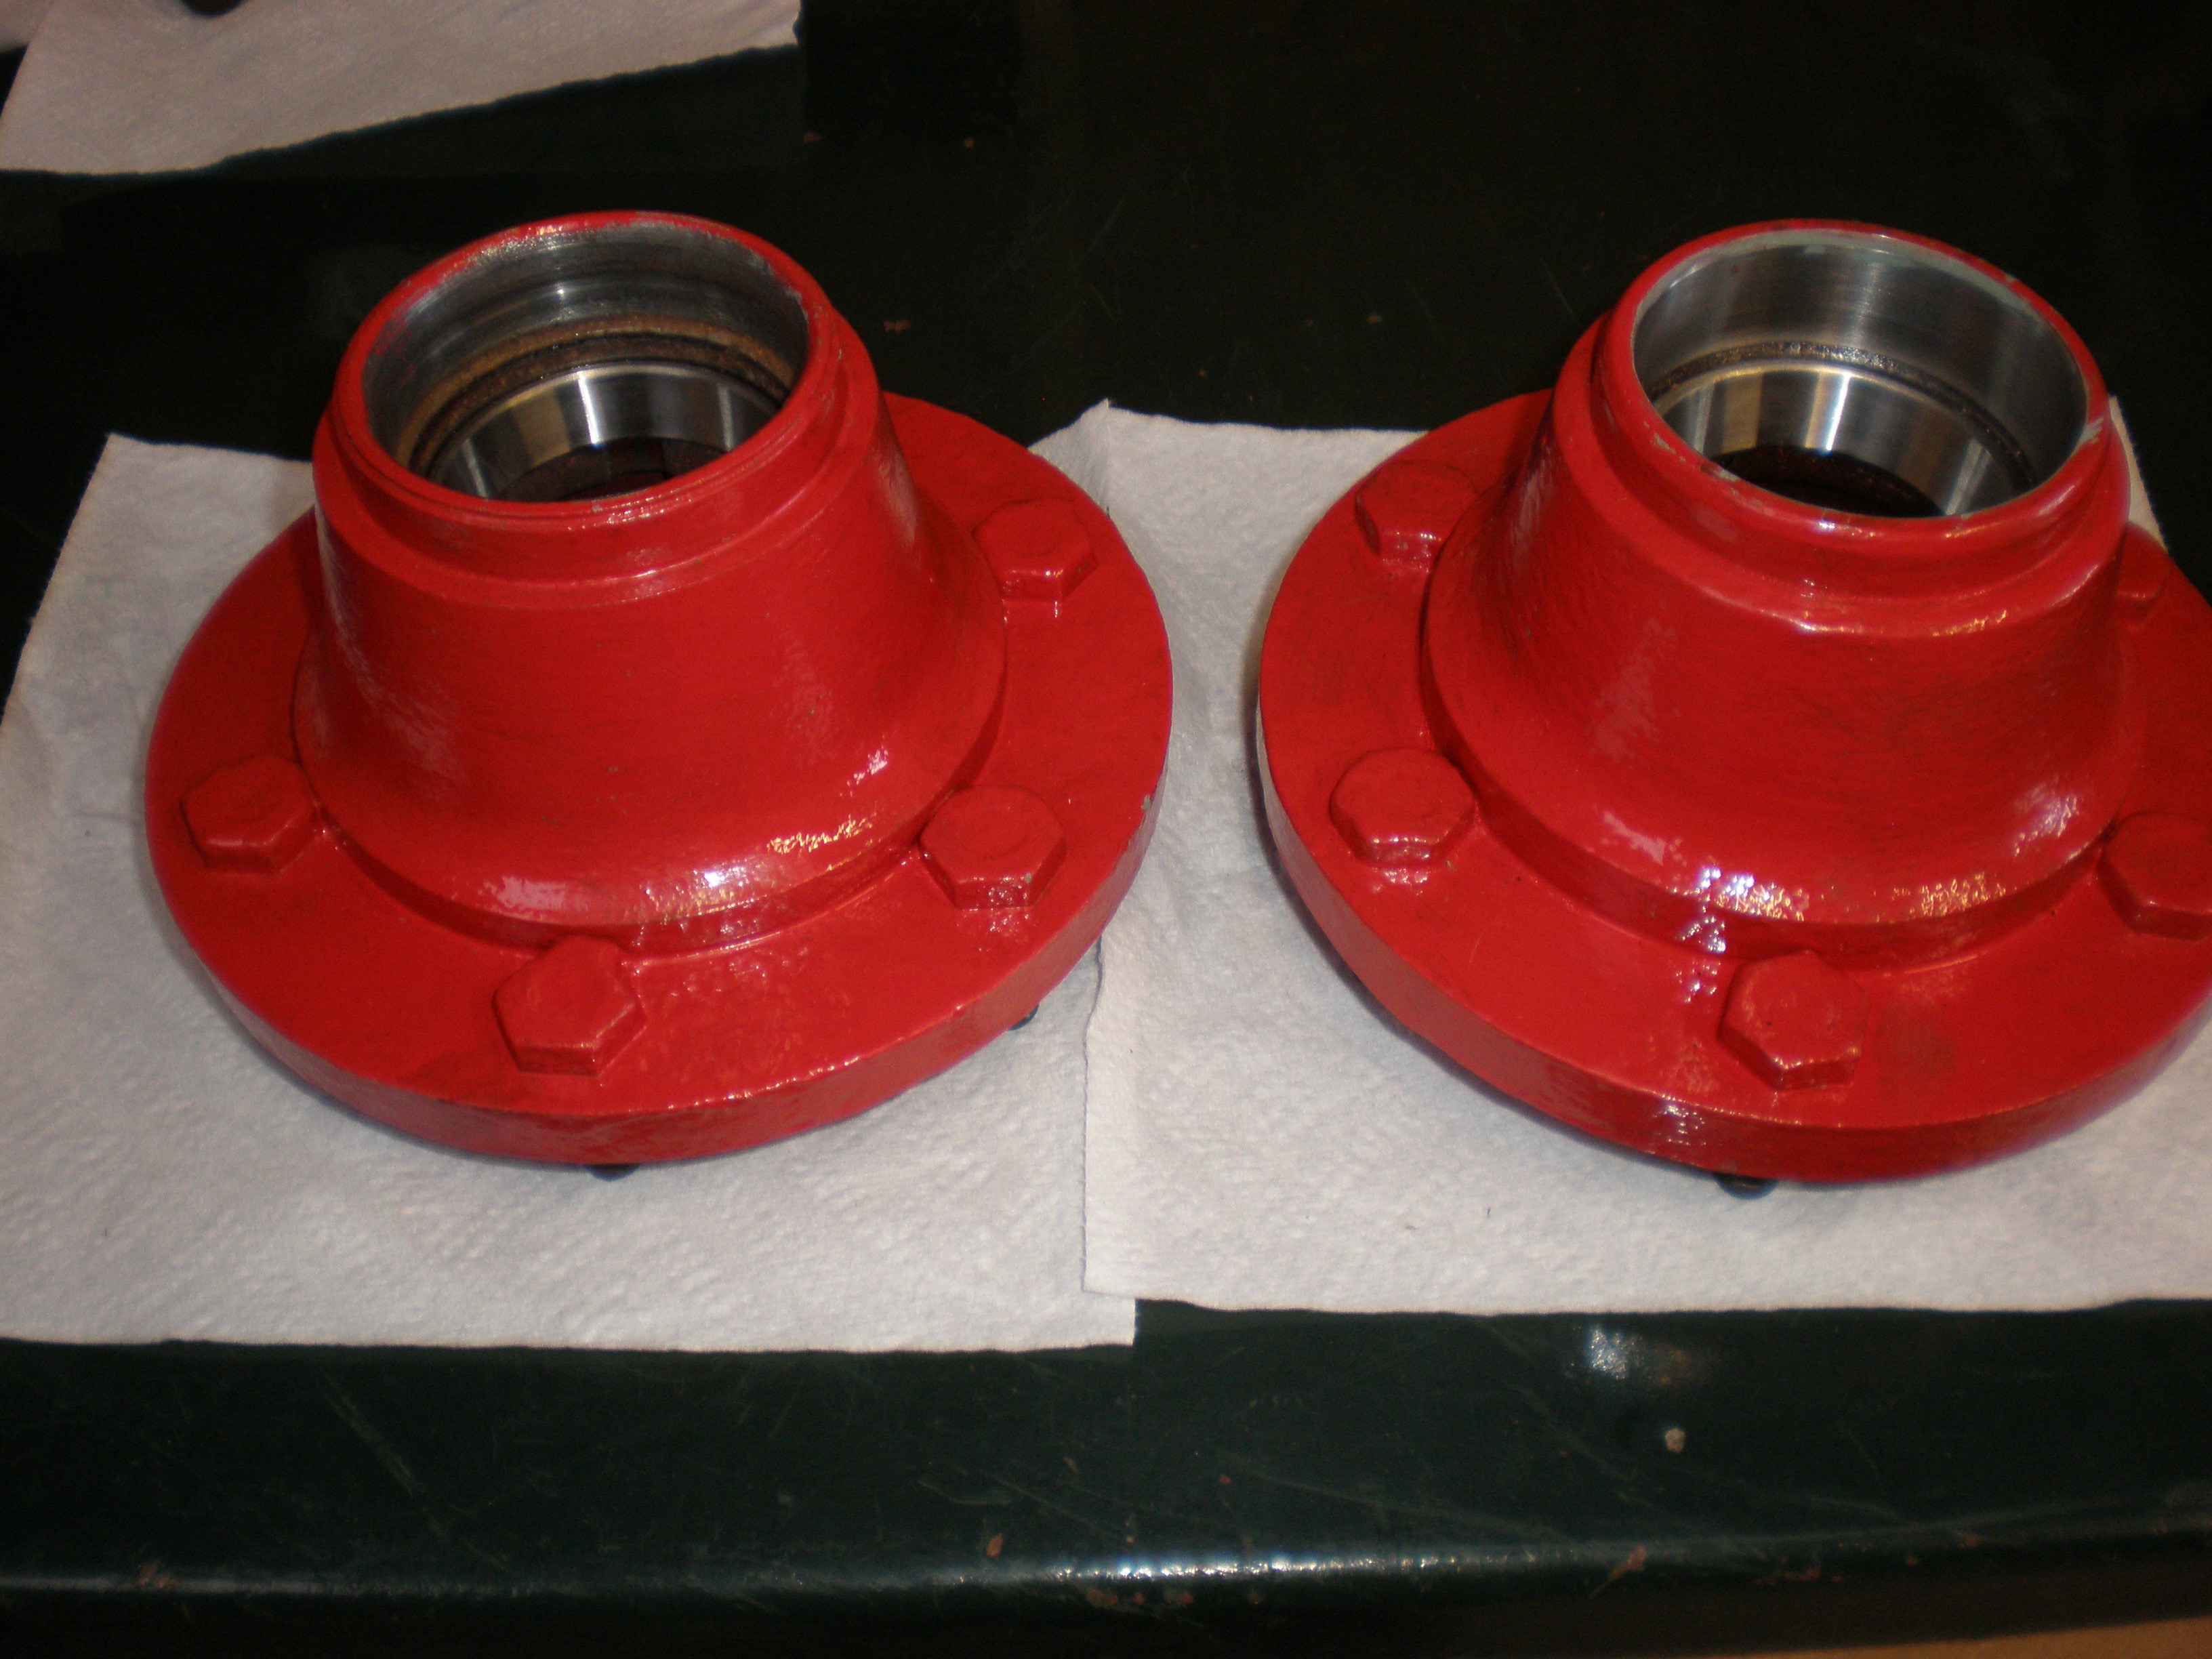
The steering knuckles and hubs are freshly painted
Axle Extensions
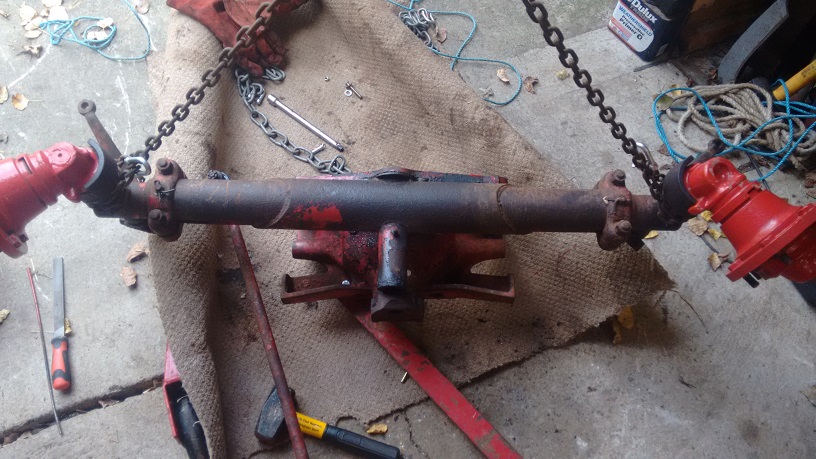
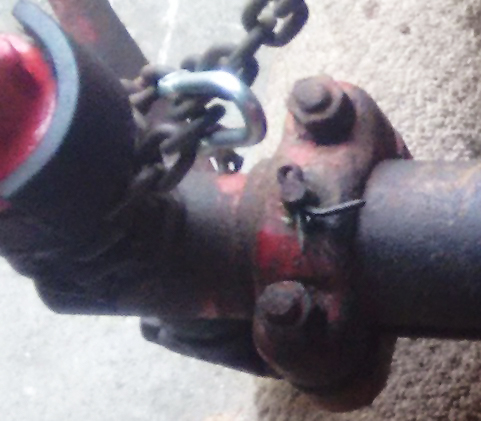
The round axle extensions are held in place by two clamping bolts and a locating pin as shown in this photograph. The locating pin goes through holes in the axle extension to adjust the tracking in fixed 2” steps.
As many tractors never had their tracking adjusted, getting the axle extension to move can sometimes be very difficult – on this particular tractor the bolts and pin came out ok but it still wouldn’t come apart even with an oxyacetylene torch.
This is an example of the square type axle extension which is held in place by two special bolts as mentioned earlier. These bolts have a shoulder which locates tightly into the main axle, is a relatively tight fit in the holes visible in the photograph and are tightened to a high torque (250->280 ft lb) which squeezes the square axle’s walls against the axle extension. If these bolts aren’t tightened correctly the extension can move and the mounting holes wear.
However, most of these axles never get their tracking changed and so everything seizes solid – getting them apart after 50 years can take some effort. Firstly the nuts need removing – generally this isn’t too difficult given a little penetrating oil, sometimes heat and a long breaker bar on a sturdy socket… a 6-sided socket is much better than a 12-point version which is much more likely to chew up the nut. The nuts are standard UNF so readily available but the bolts are difficult to find and expansive so it is important not to damage them.
With the nut off, the next step is to try to get the bolt to turn but it will probably be seized in both the main axle and extension. This could take a lot of heat to free the rust as one has to heat through the axle to get the extension hot. Don’t be tempted to try to hammer the bolt out unless it will turn as this will just cause the bolt to barrel out and get even tighter.
Once the bolt is starting to move, work it backwards and forwards with plenty of penetrating oil until it is moving relatively freely. Don’t try to unscrew it initially, just work the breaker bar backwards and forwards in gradually increasing angles with regular re-application of penetrating oil. This method is intended to free the bolt from head gradually down along the bolt’s length as most of the torque is focused around where the outermost tight point is. The bolt twists slightly in torsion, the penetrating oil is worked into the gaps and slowly the tight spot moves along the bolt. If you use too much torque the bolt could shear so take it slowly.
The nut can now be put on flush with the end of the bolt’s thread and knocked part way out, but do use a piece of brass (or something similarly softer than the bolt) between hammer and bolt to avoid damage. Eventually punch the bolt out with a brass drift.
Steering Knuckles
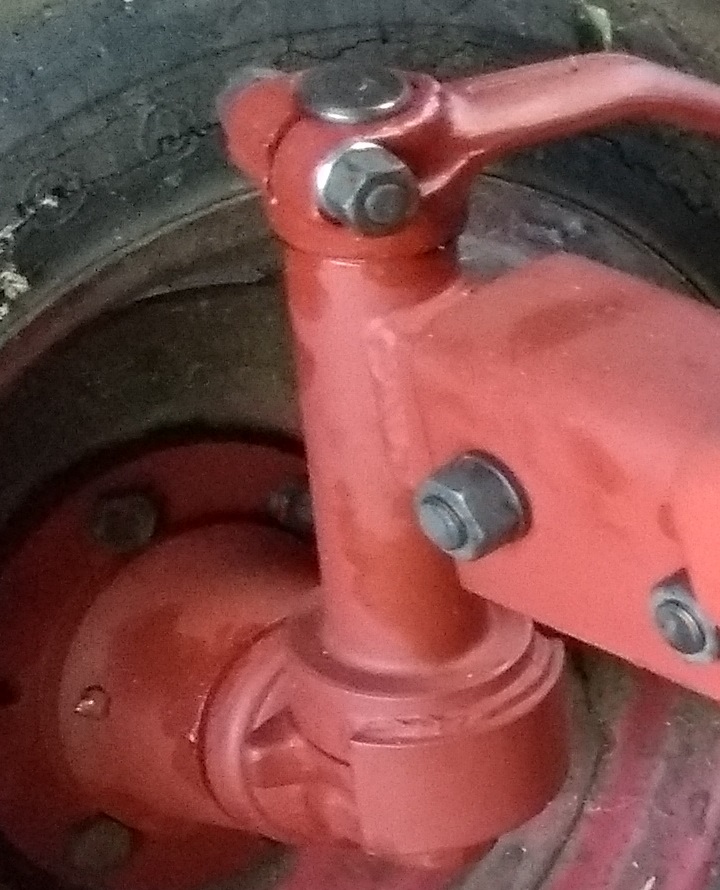
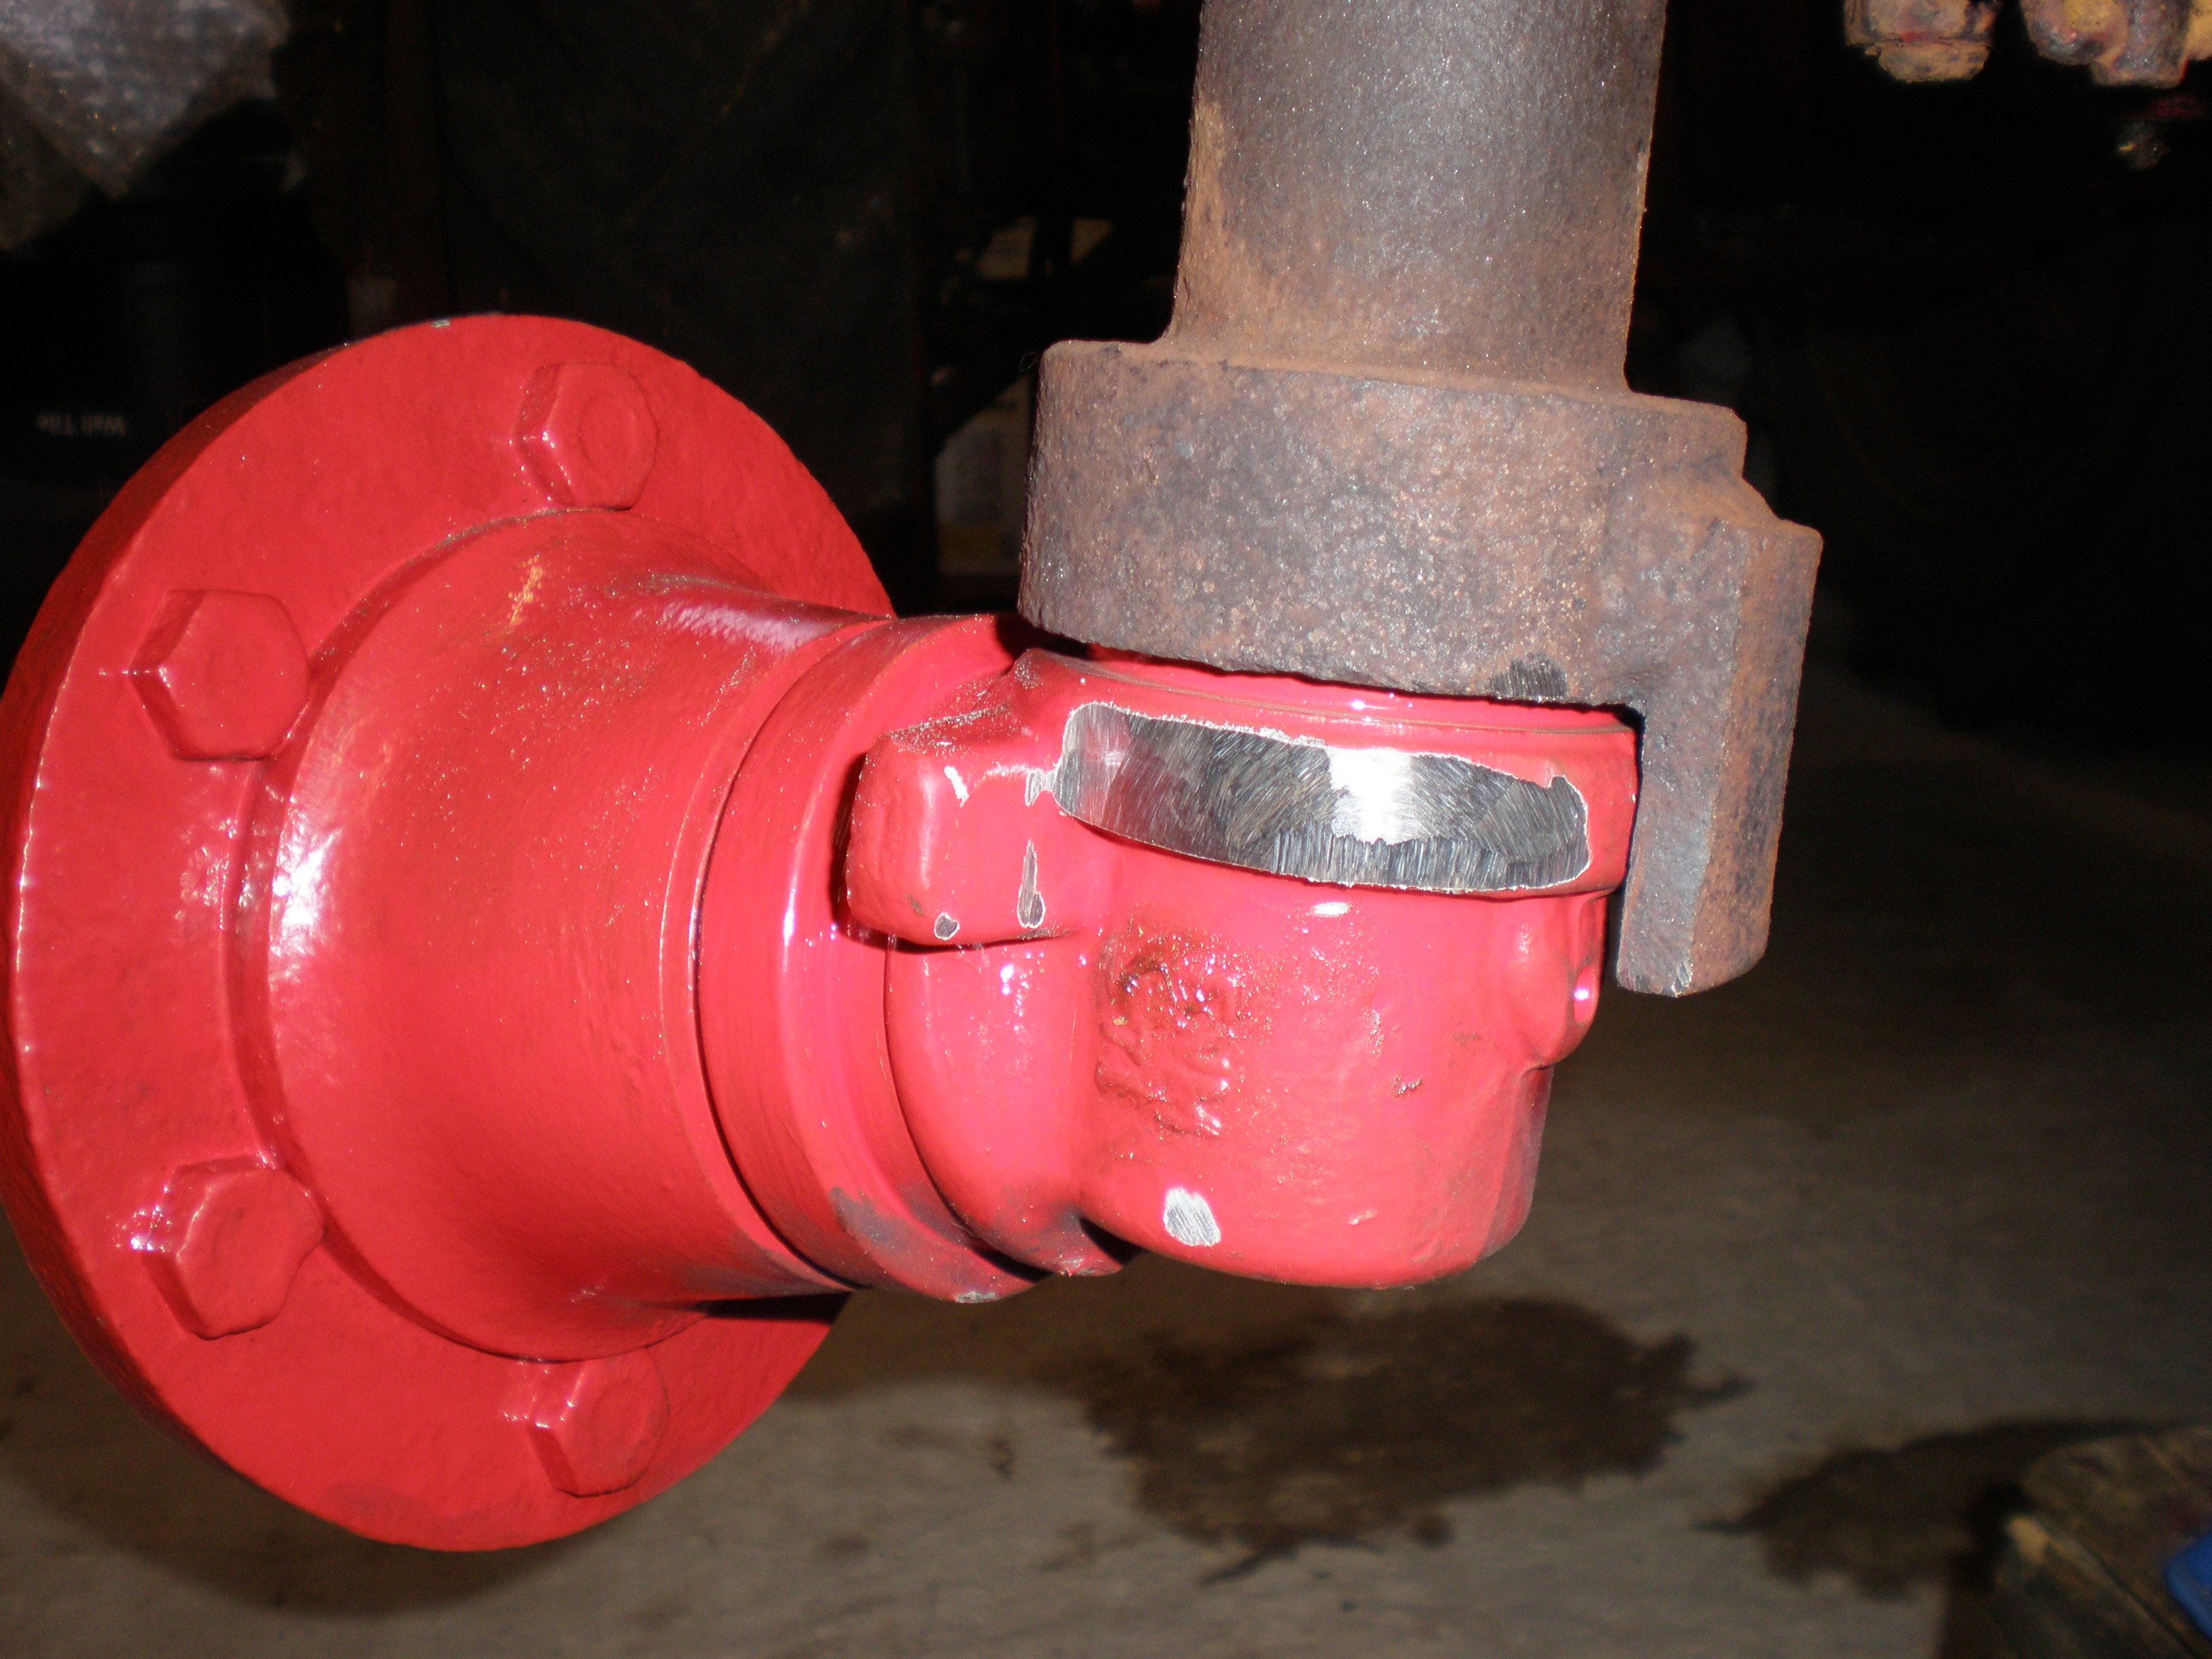
The steering arms are fastened to the steering knuckles with a pinch bolt (show at the top in this photograph) and an alignment woodruff key (not visible).
The pinch bolt is removed and then the steering knuckle knocked down through the steering arm – use a brass drift to avoid damage.
Remove the woodruff key (don’t lose it as they aren’t that readily available) and the whole steering knuckle and hub will slide out of the axle extension.
Hubs
The cap on the outside of the hub is held on by 3 bolts. Behind that is a castellated nut with a split pin. Remove the split pin, undo the nut and don’t lose the heavy washer behind the nut as they aren’t readily available – almost everything else in the hub is available, just not this washer.
With the nut and washer removed the hub should just pull off.
Anglo’s wheel bearing kit (A49805) contains the felt washer, lip seal and both tapered roller bearings for the later hubs and steering knuckles. If you have early steering knuckles you’ll have to find a different outer bearing from a specialist bearing supplier
Assessing Wear and Rebuilding
Hub
There are two different designs of hubs fitted. The early ones didn’t have a lip seal on the inside edge, just a felt washer. Later hubs have an extended inner edge and provide space for a lip seal between the felt washer and inner tapered bearing.
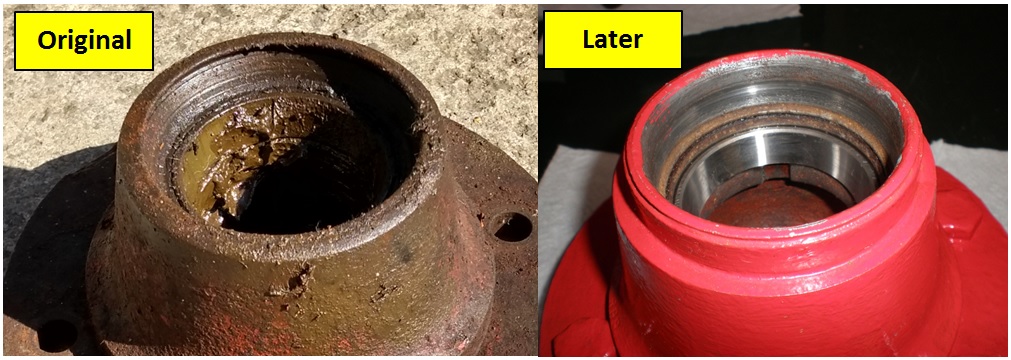
In the past I’ve modified the earlier hubs to take the lip seal by adding an extra sleeve as shown in this photograph (the one on the right is the modified early hub) when hubs were difficult to get and expensive, but at Anglos current price for the hub (A68071) I’d just replace.
The wheel nuts are ½” UNF (A49019) and the bolts are hex headed with parallel shanks that press into the hub (A62182.) The hex heads should locate against an edge on the hub, but tolerances and rust can make them slack.
If the threads aren’t kept clean and free (personally I assemble with a little copper grease) then the bolts end up turning in the hub when removing the wheel and wearing the fit so the problem gets worse. Some people even revert to welding on steel bars to join all the bolts together to stop them turning! A better solution would be to remove the bolts and add a little weld to one of the flats so when it is refitted it can’t rotate.
Aside from physical damage and the way the wheels studs fit, the most common problem area on the hubs is wear where the lip seal runs. This picture shows where the seal has been running but the surface is smooth and the groove is very shallow so is not a problem. If however there is a deeper grove then it may be necessary to add a lip wear ring (A50957) so the seal has a good surface to run against.
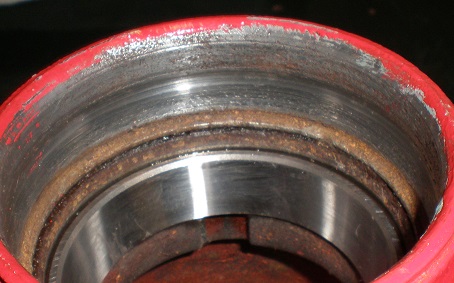
The bearings are simple press fit and the photograph shows one of two notches under the outer bearing shell where the shell can be knocked out with a punch. When replacing the bearings, always grease well with Lithium grease (e.g. A67206) including where the lip seal will run.
Steering Knuckle
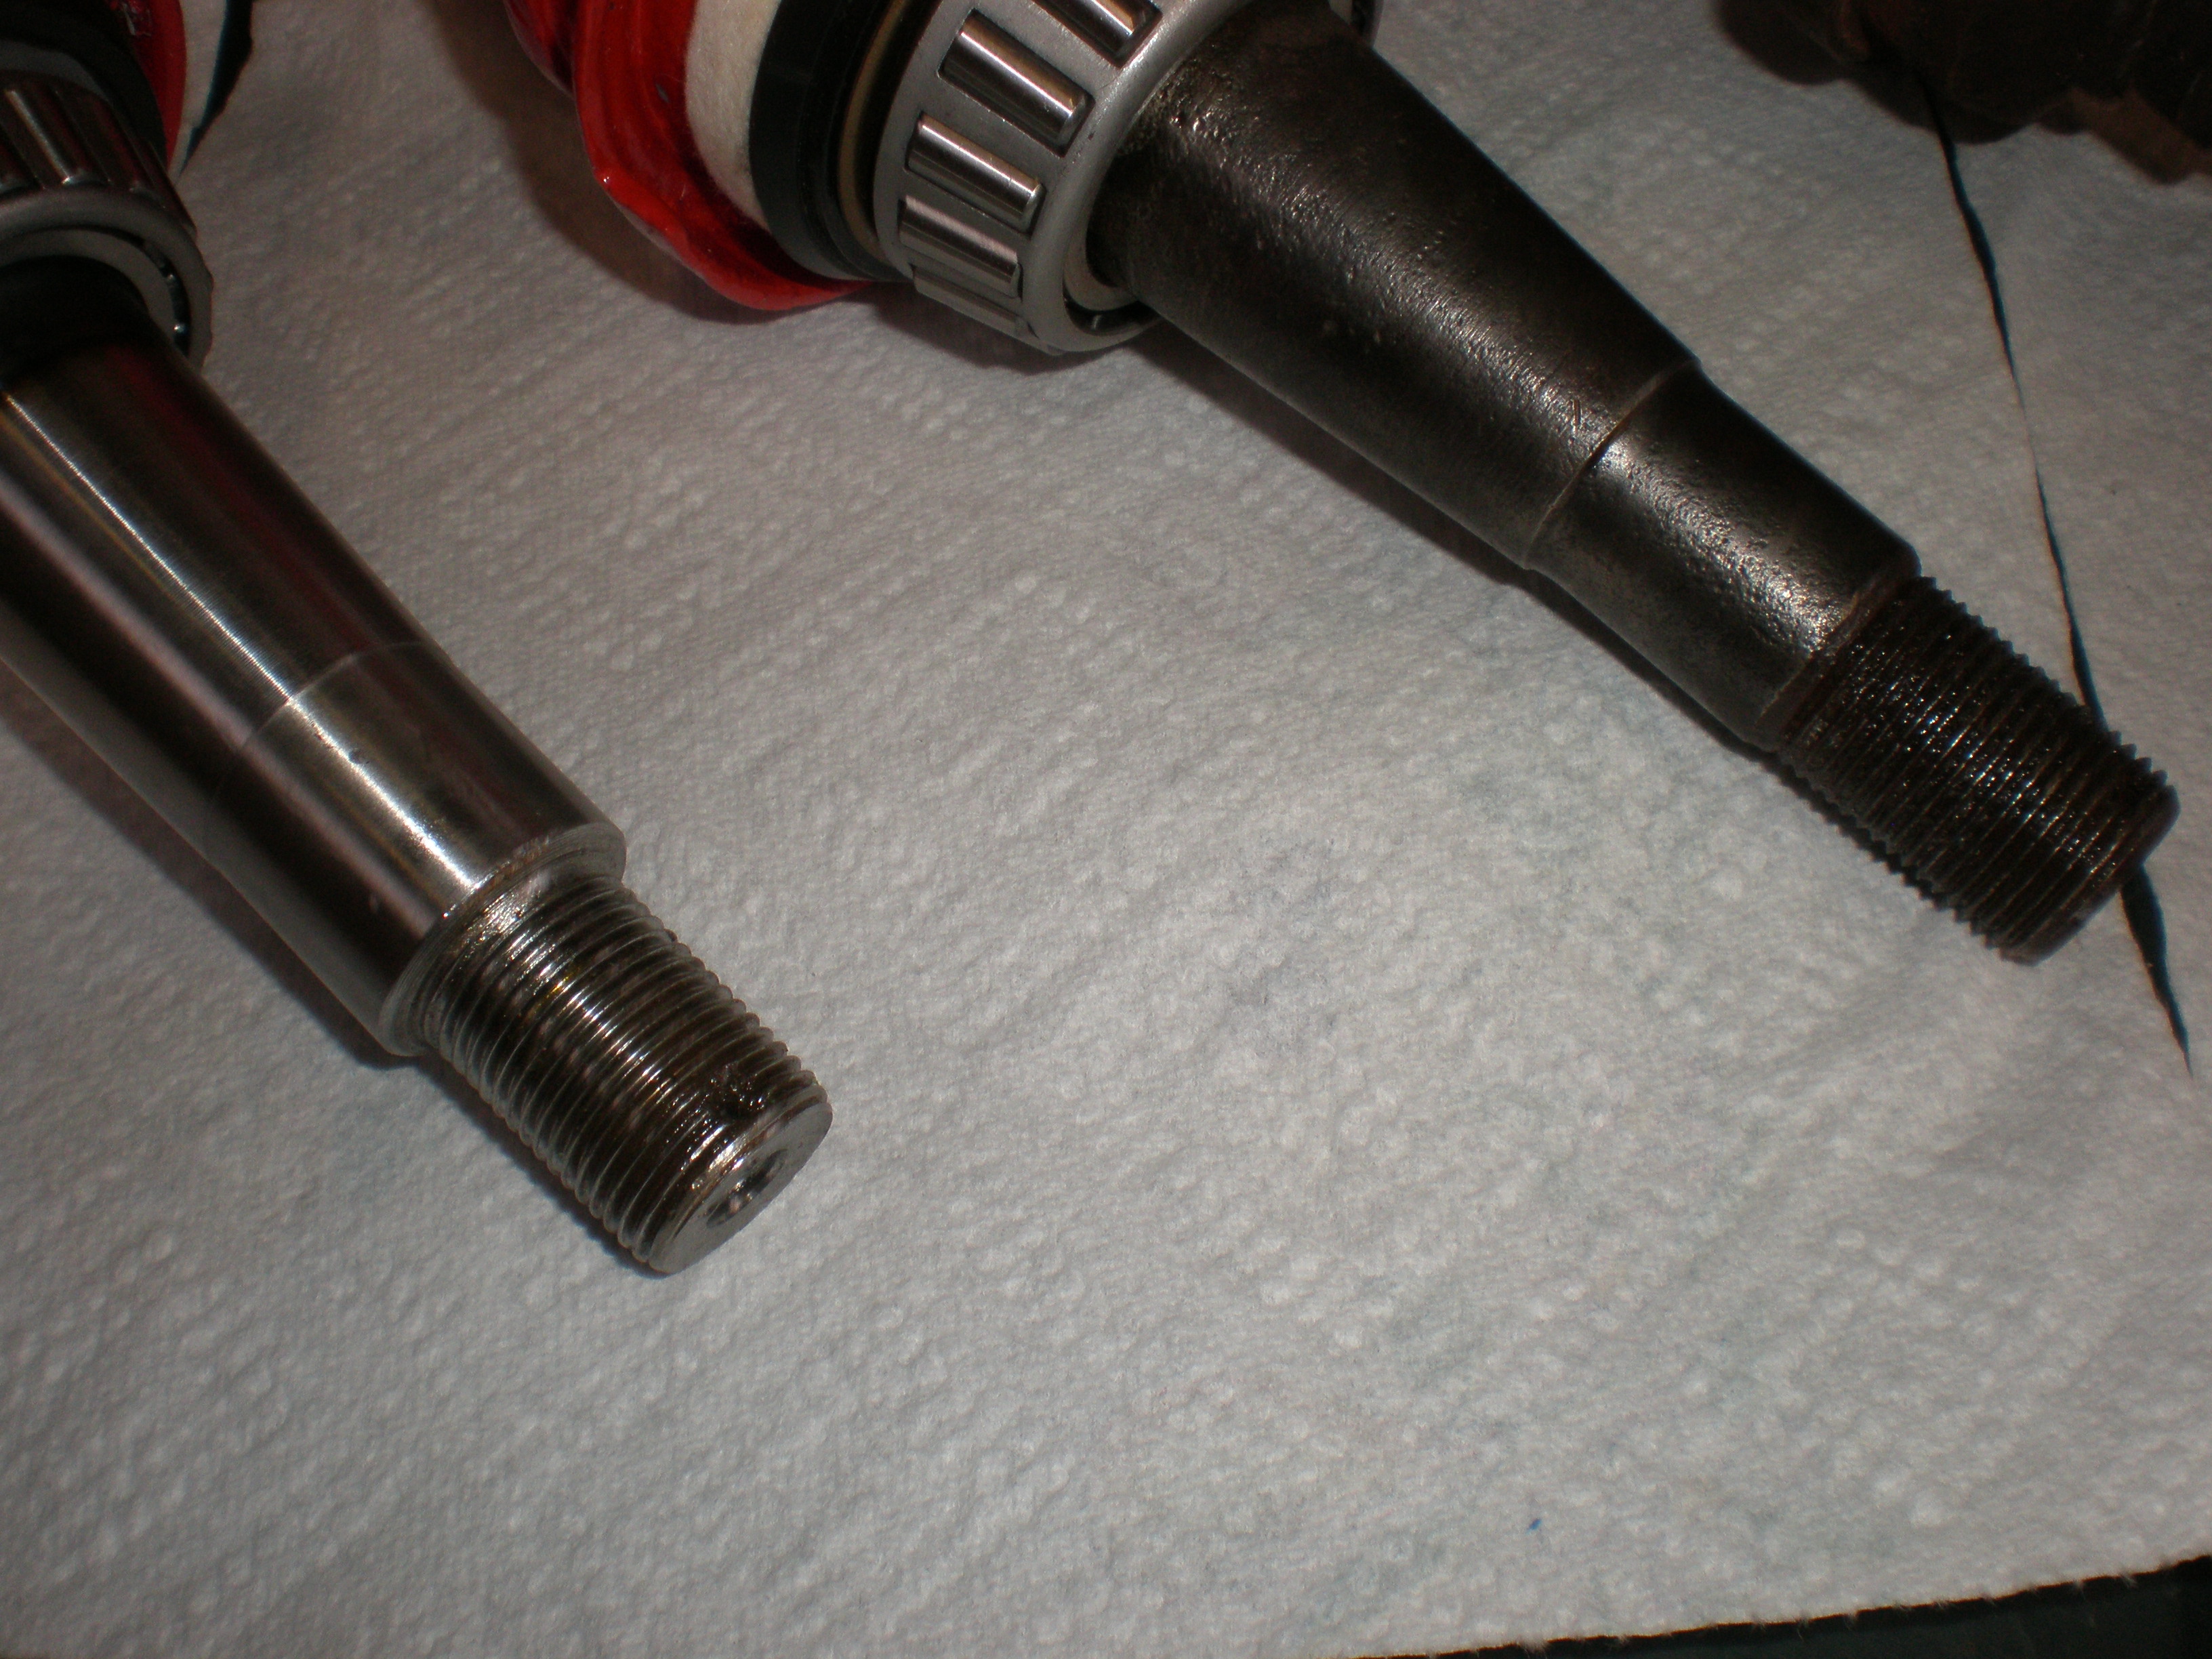
Two different design steering knuckles have been used with the earlier ones having a smaller inner diameter for the outer tapered roller bearing.
It is possible to use the later style on earlier tractors but it will also need a different outer bearing.
Not all replacement steering knuckles are created equal.
The original steering knuckle has a press-on dust shield which tends to be in a poor state by the time the knuckle needs replacing. Almost all adverts for the replacement knuckles show the shield fitted, but this is what one company (not Anglo) actually sent. The only source of new dust shields was CASE IH at a 1 off cost equivalent to two steering knuckles. Despite the difference between the advertised and delivered part, the supplier was most unhelpful… so doesn’t get any more business if I can help it.
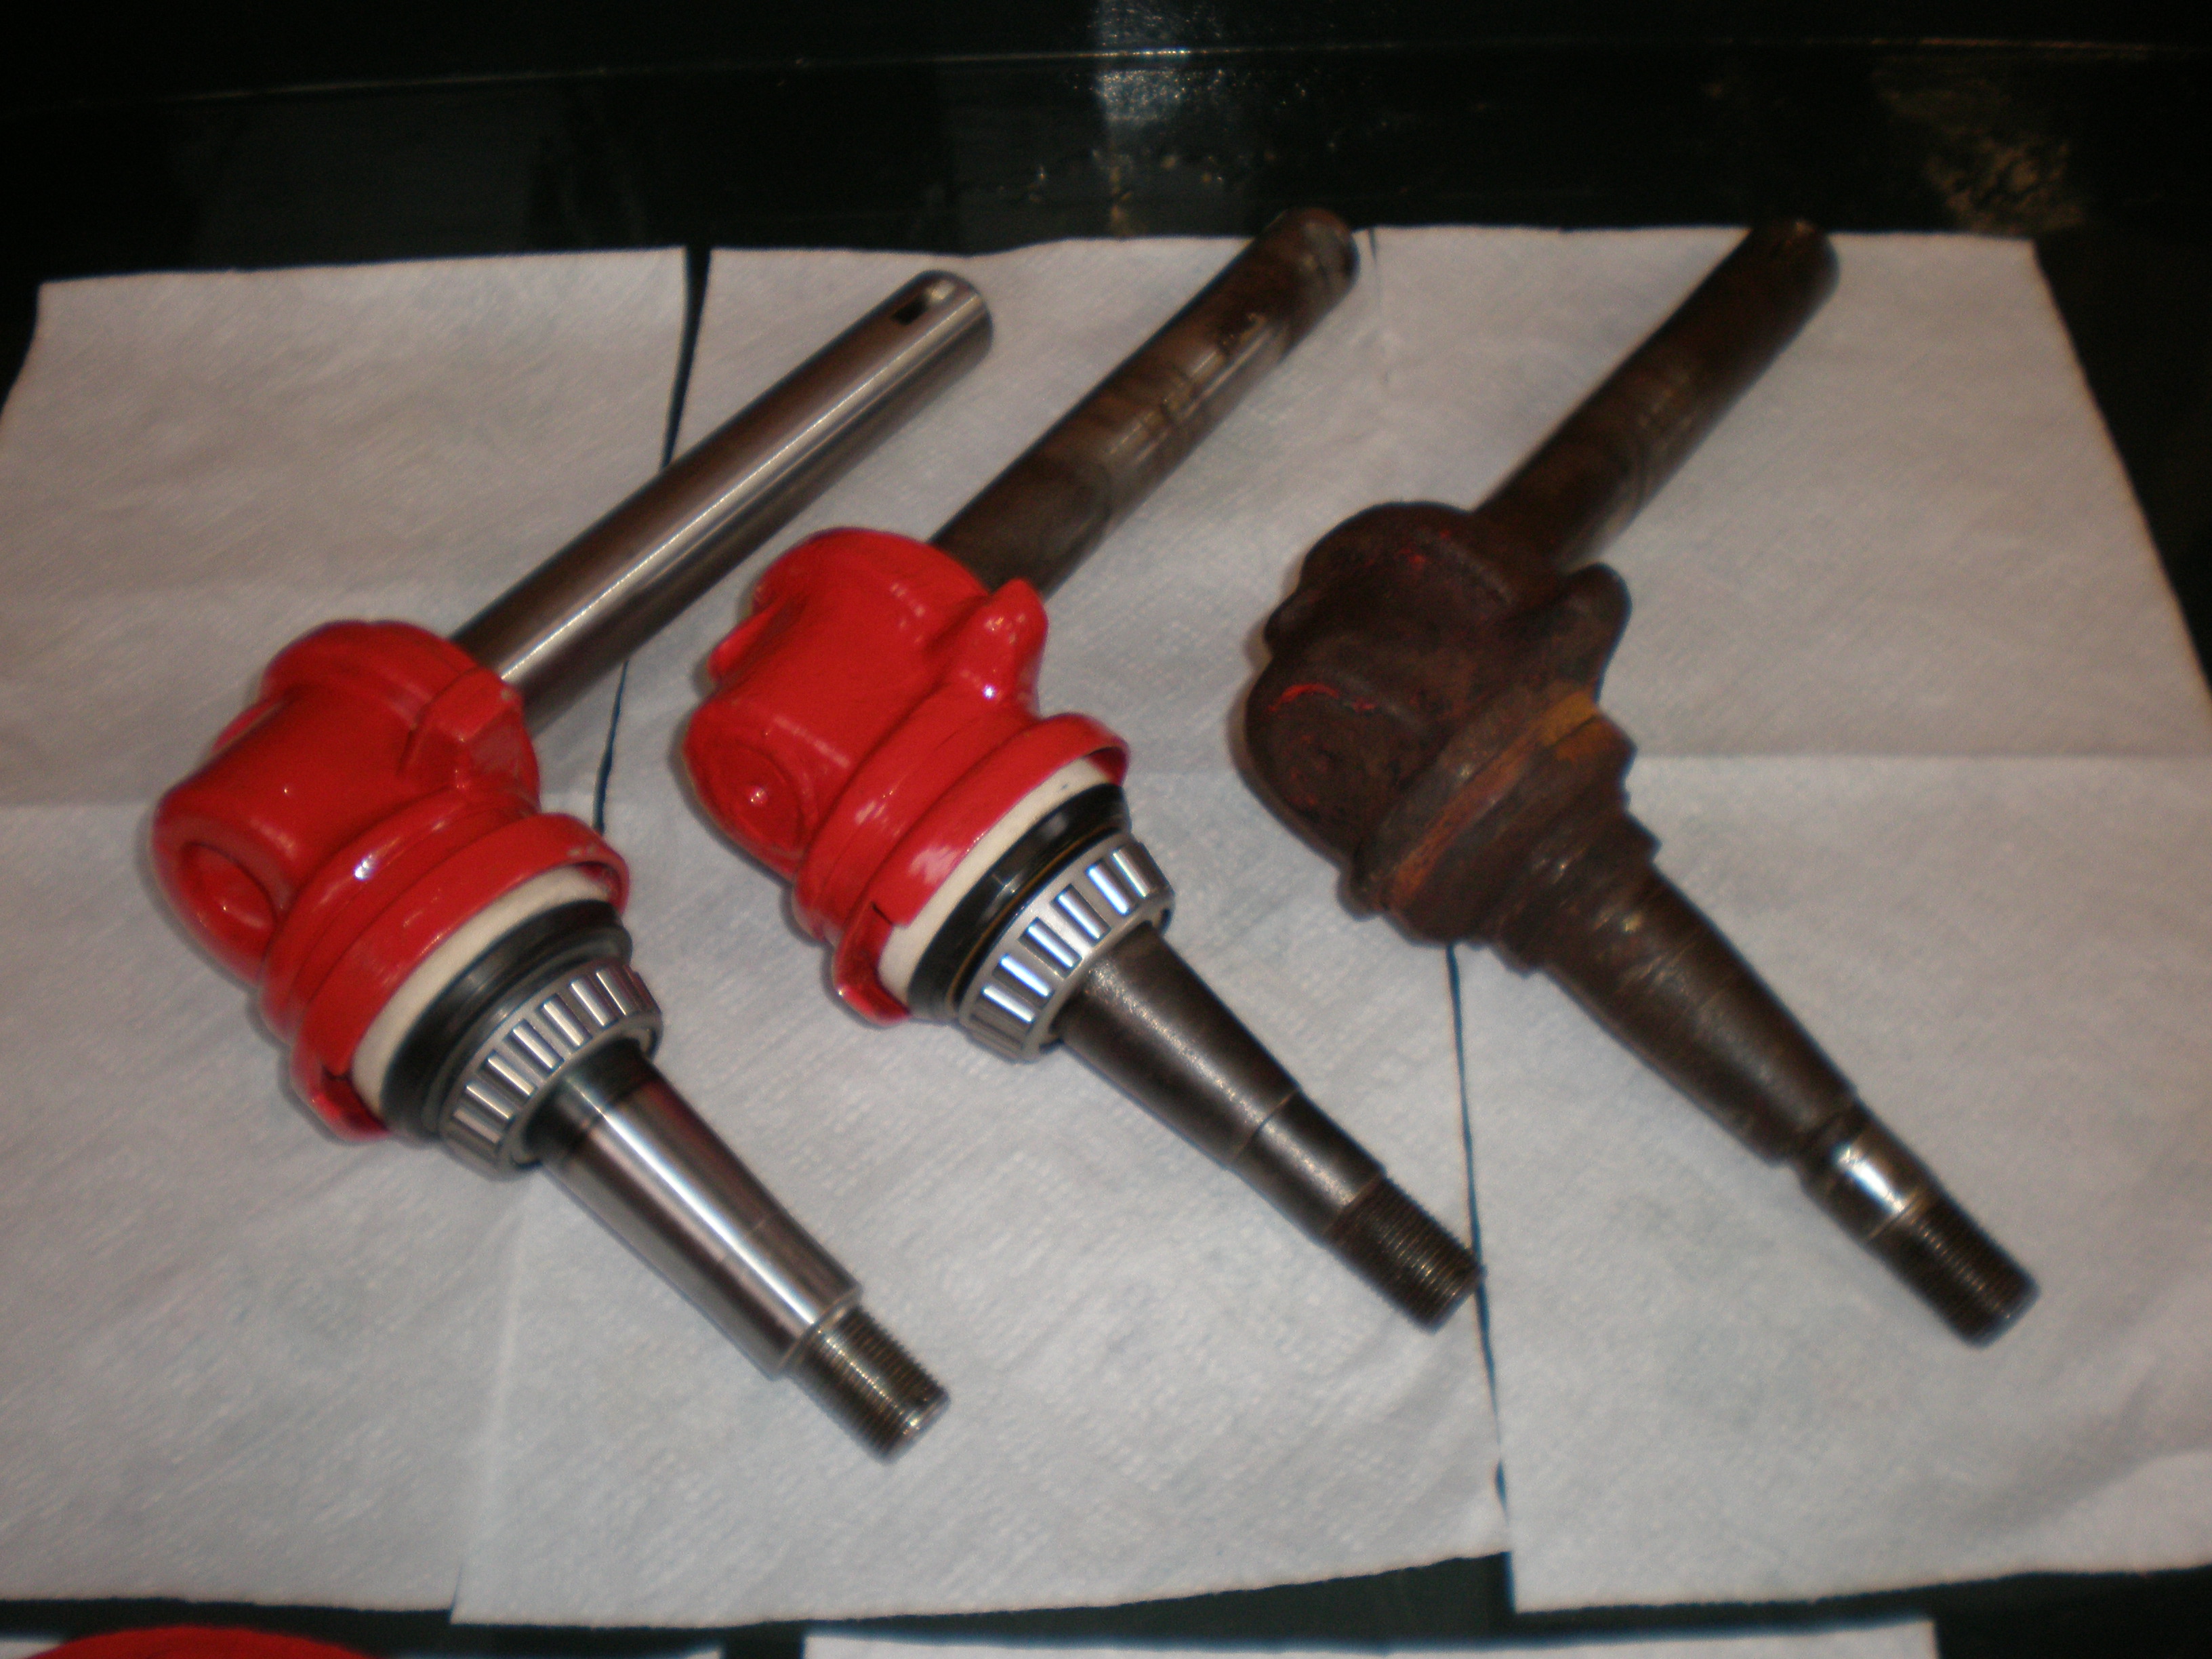
My solution was to machine a replacement from solid bar. The three examples in this photograph are, from left to right;
- replacement with homemade dust shield,
- rebuilt original
- and a damaged early type original where someone had made a rough spacer to allow a later and larger ID bearing to be (ab)used.
The final insult with this knuckle came when the tractor was driven out of the workshop – the tractor would only turn right, not left. The forging was of such poor quality that it had to have quite a lot removed with the angle grinder before it would turn in the other direction.
The lessons learned from all this is that not all part suppliers are equal and that it is a good idea to trial fit all parts before painting.
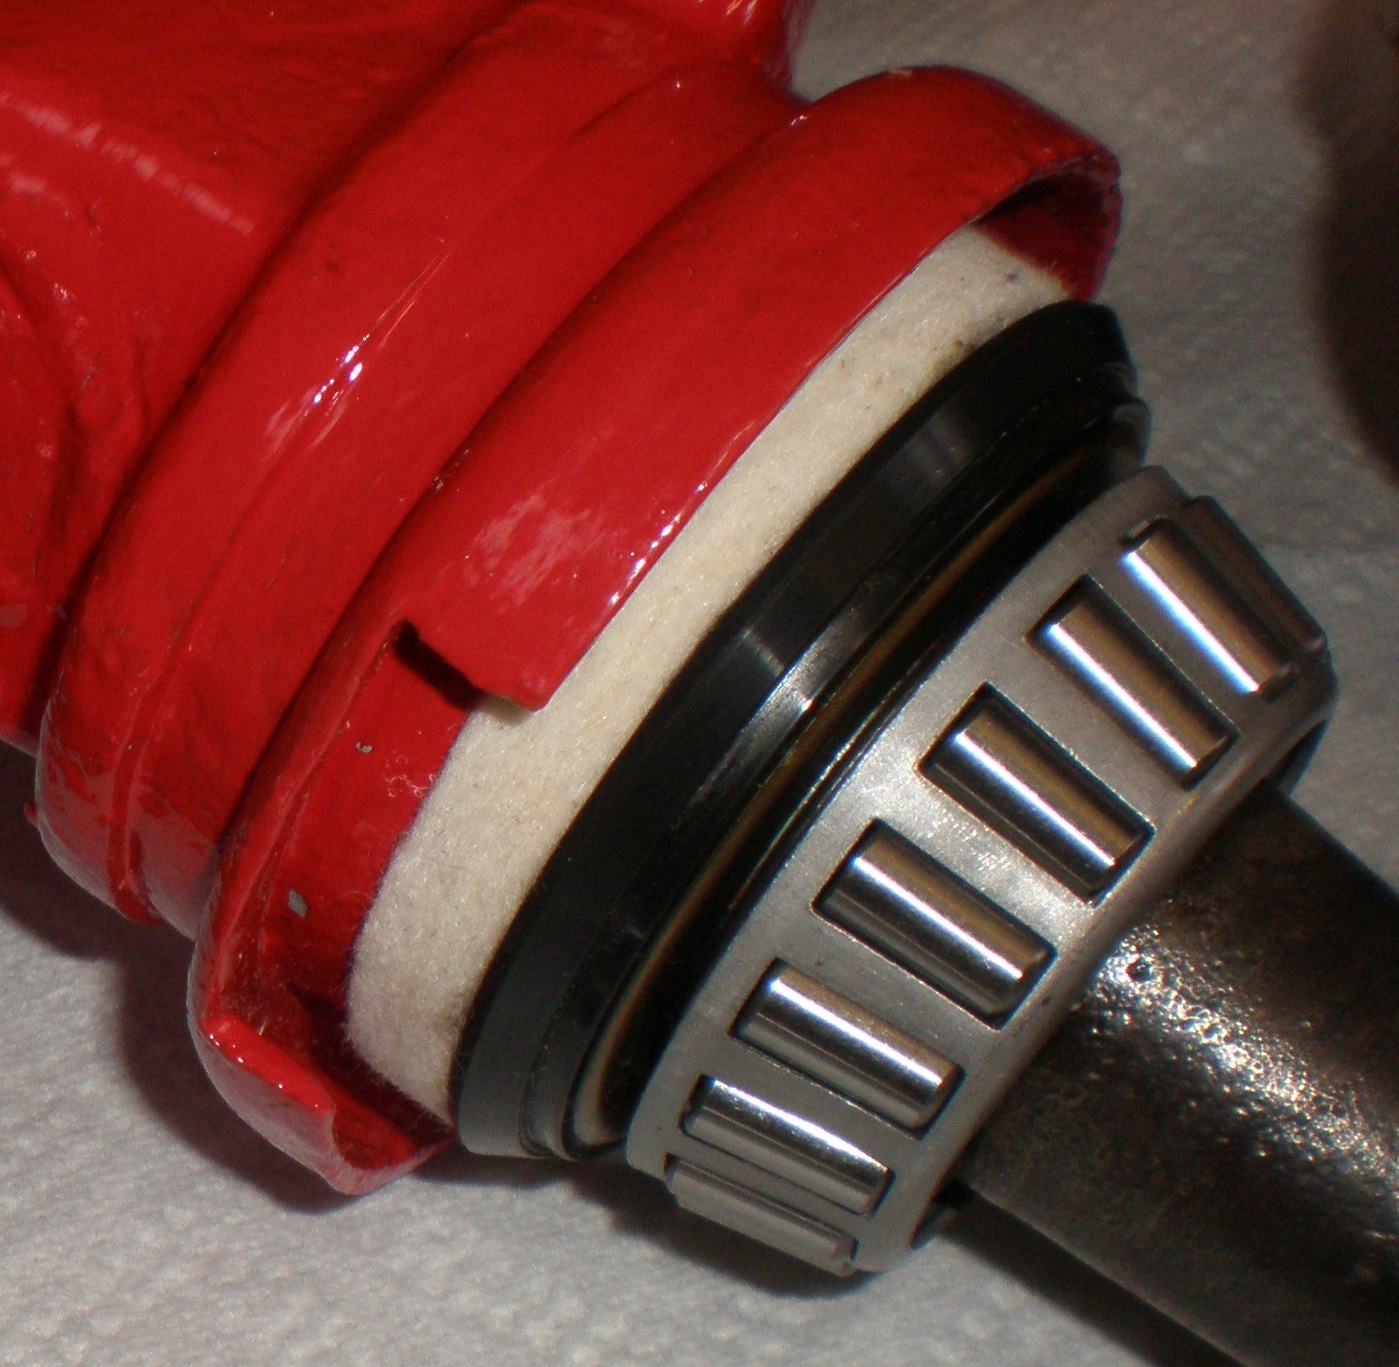
One final point when rebuilding the steering knuckle is to get the lip seal the correct way round. Its purpose is to keep dirt out of the hub, NOT to keep the grease in.
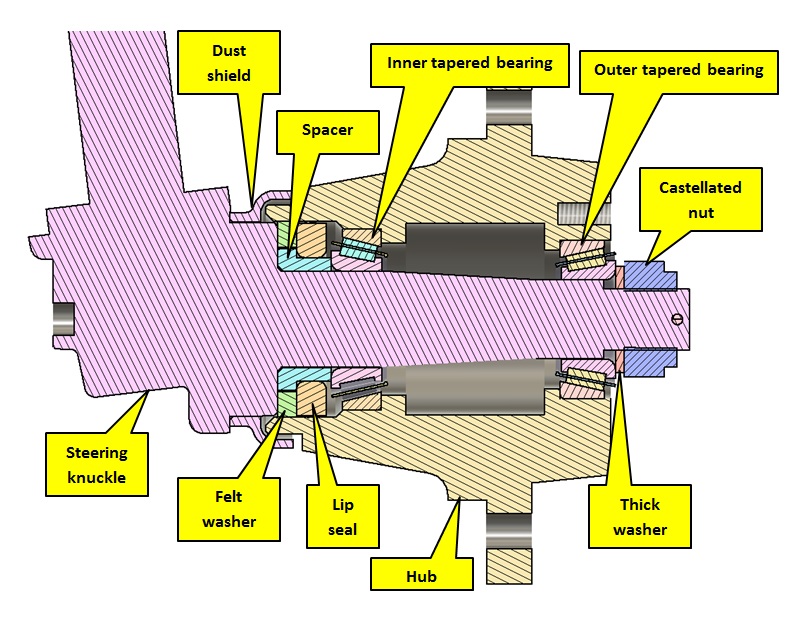
This photograph shows the correct assembly. Working from the hub side of the dust shield, the assembly order is:
- Spacer – hidden but see earlier cross section where it is identified.
- Felt washer – sits on the outer diameter of the spacer.
- Lip seal – pressed onto the inner diameter of the spacer. Ensure that it is the same way round as in this photograph.
- Inner taper roller bearing… and don’t put that on back to front!
When the hub is finally assembled onto the steering knuckle, tighten the nut until the hub becomes difficult to turn (this fully seats both bearings) then slacken off till the hub is free and the cast elations line up with the split pin hole. Fit the split pin.
Axle Extension
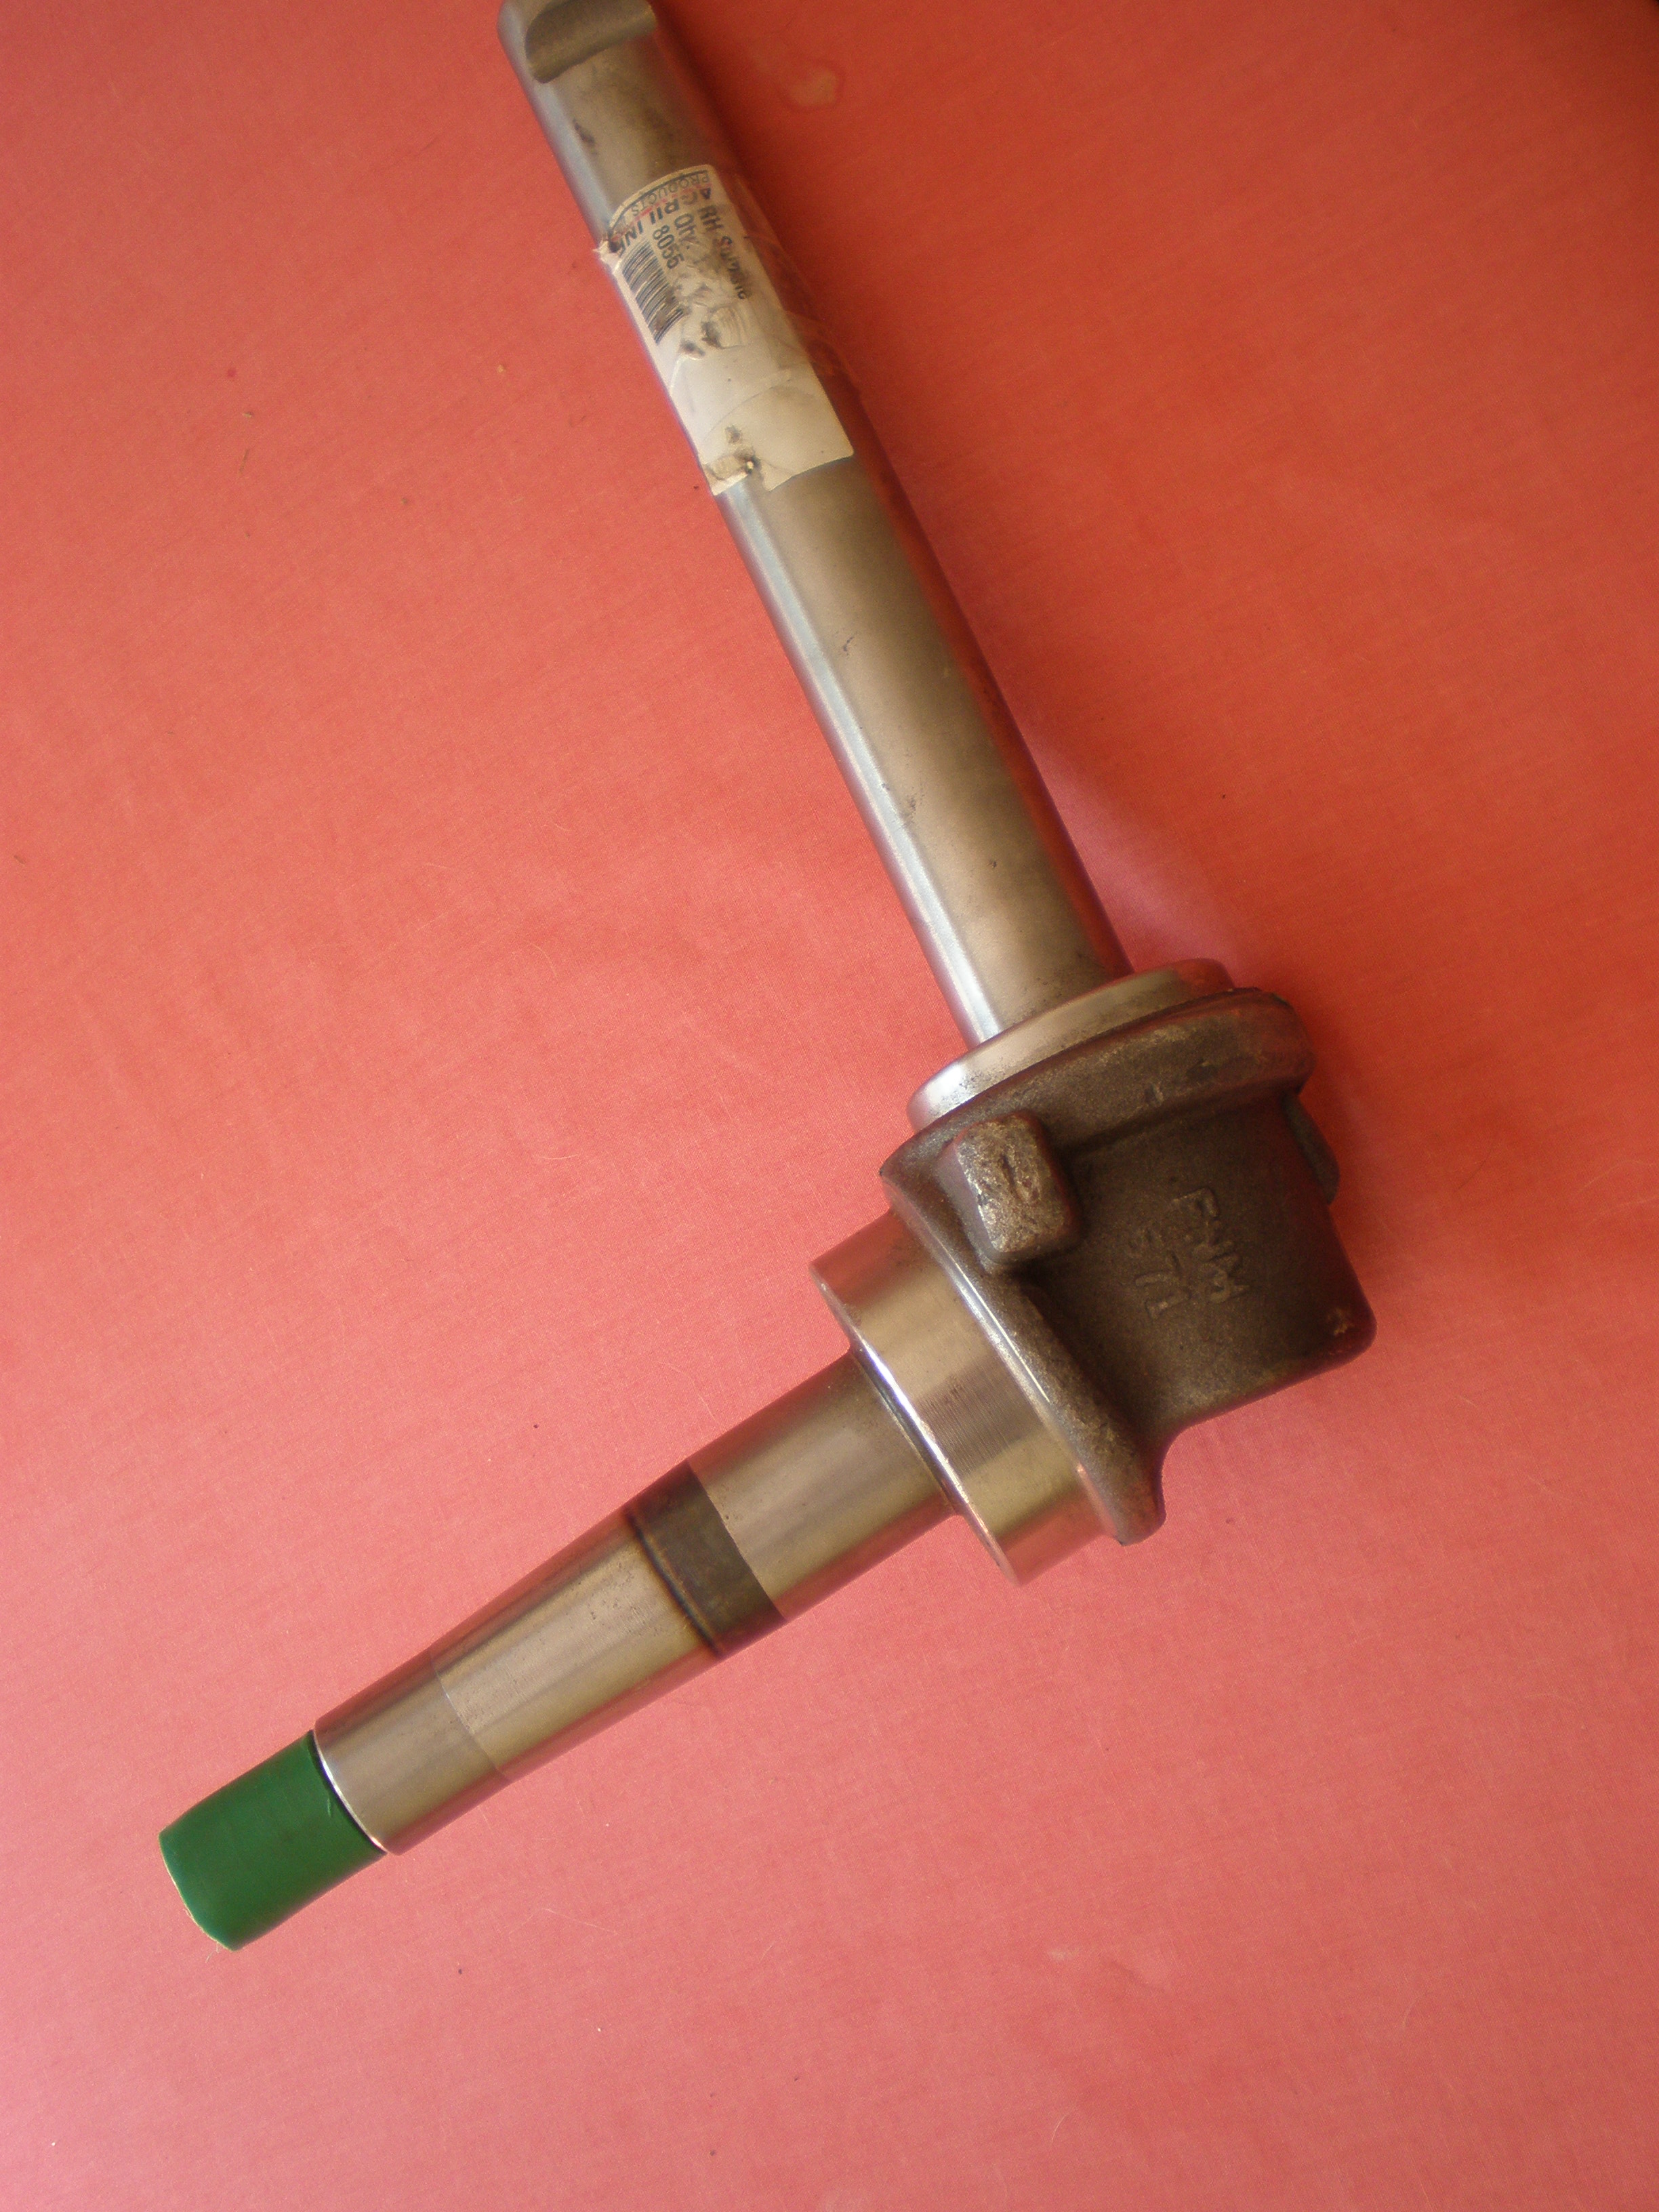
Aside from unusual physical damage, the two main areas to consider are the thrust race and the kingpin bushes.
Thrust Race
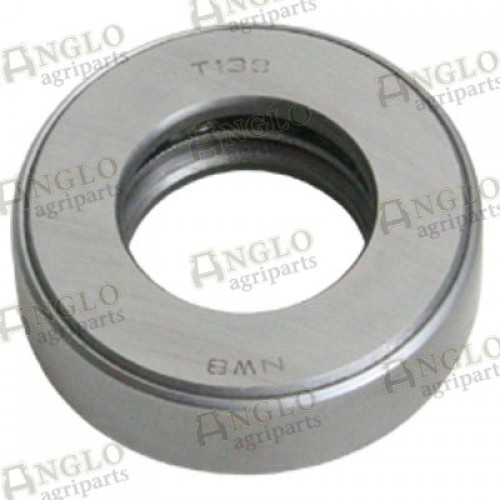
There should be a thrust race inside the cup at the bottom of the axle extension, though I have found a tractor where this was just a stack of rusty washers – very stiff steering! This photograph is an example of an old one with its cover removed showing the consequences of not greasing regularly.
Sometimes these bearings are a lose fit while others can be so badly rusted that they seem to be part of the axle extension.
The lower face should rotate freely and smoothly – if it isn’t perfect, replace it as it makes a big difference to the steering.
Anglo’s part A45338 is the correct replacement bearing and should be inserted into the cup with the pressed steel case into the cup and the face shown in this picture facing towards the ground.
Bushes
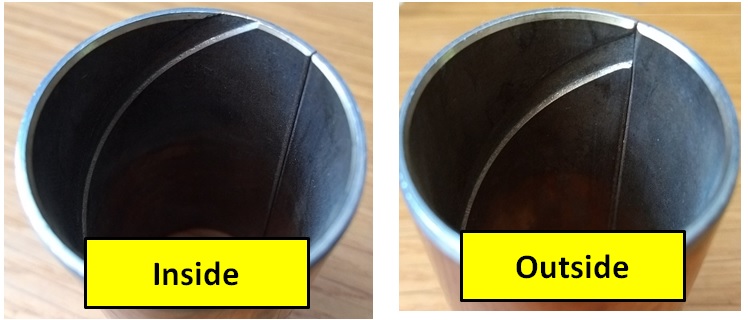
The bushes have a steel backing and an inner bearing surface with a grease groove.
There is a correct orientation when fitting these. The groove needs to be filled with grease from the centrally mounted grease nipple so the end where the groove is open full width at the end of the bush is inserted first.
Tolerances on the early original bushes required them to be reamed to size once inserted but the modern parts don’t seem to need this.
Supplies change so reaming may however be necessary. The kingpin part of the steering knuckle should rotate smoothly but there should be NO side to side movement.
Getting these bushes out can be something of a problem as it is almost impossible to punch them out from the other side.
As the bushes are split, and visible in the previous photographs, one approach is to fold them into the centre using a cold chisel. Personally I don’t like this method as it is easy to damage the axle extension, but there are a couple of alternative methods that I use on these and the axle bushes.
If something can be attached to the inside of the bush then it can be pressed out using a long pin (e.g. the shaft from an old steering knuckle.) There are a couple of “somethings” that can be used:
1. A tap inside the bush is a tap of the correct size – the tap cuts a thread into the bush but exerts no sideways force (which would make the bush even tighter.) A tap with a fine pitch thread is preferable as there is less metal to remove and at these diameters, the difference in force required to cut the thread is significant. Picking the correct size tap isn’t that hard. From the workshop manual the bush (new) internal diameter is 1.360” (34.54mm) and a new one measured at 1.49” (37.85mm) outside diameter. A metric tap would need to be a taper M36x1 or M36x1.5 – unfortunately at the time of writing these seem to cost at least £60 each! Looking on eBay however these taps can sometimes be found used for much less.
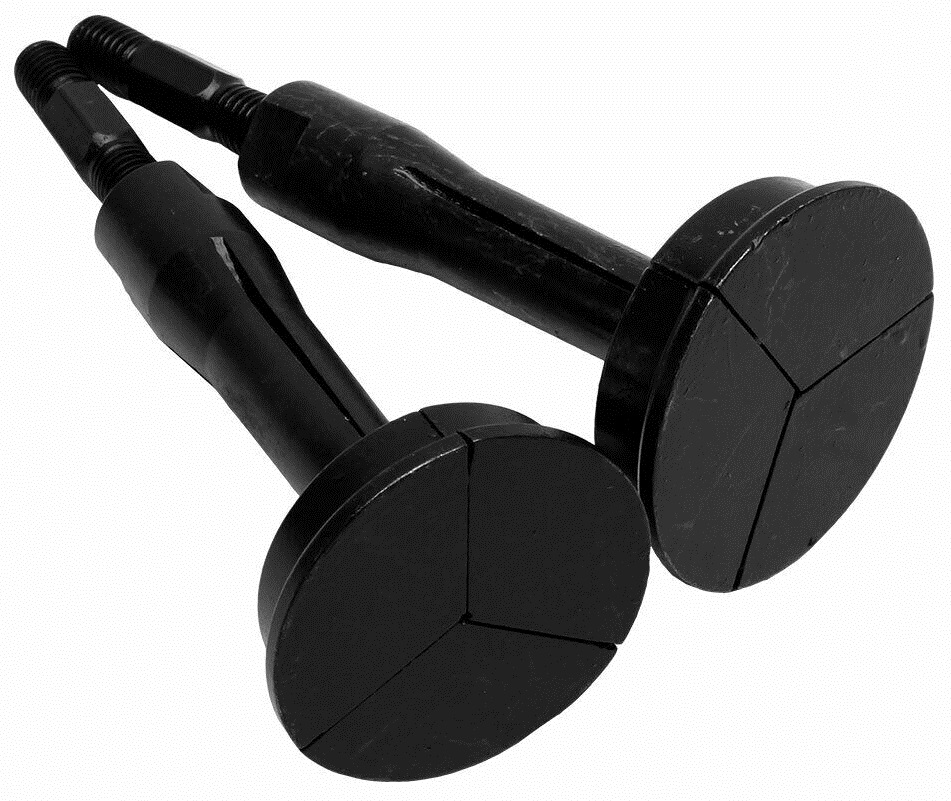
2. An expanding insert. These have a shouldered head that expands (the 3 slits visible in the photograph) when the screw is tightened and so can be pushed through the bush then expanded above it. Unfortunately there isn’t much of a lip to catch onto – tighten too much and the head binds onto the body of the axle extension, too little and the bush edge will break off.
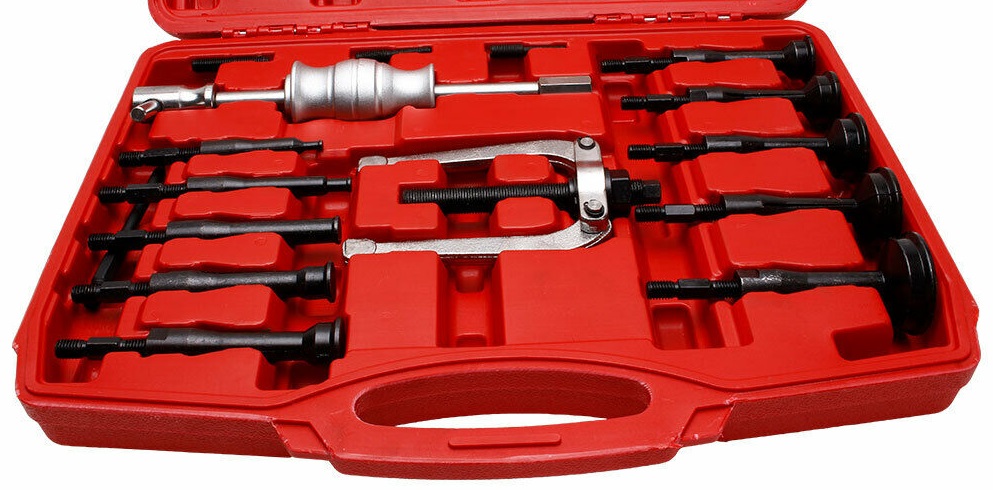
If this tool works it has the advantage that a full kit as in this picture can be found on eBay for less than the cost of a single large tap.
ARTICLE CONTRIBUTED BY ANDREW CHAPMAN
© ANDREW CHAPMAN & ANGLO AGRIPARTS LTD


Licence Terms
You are free to: Share, copy & redistribute the material in original format for any purpose as long as you follow the license terms below:
- Attribution – you must give appropriate credit and provide a link to the original article in a reasonable and visible manner
- You may not in any way suggest that the licensor endorses you or your use.
- No Derivatives – The material must be distributed in full, including disclaimer, you may not distribute or share modified material.
- No additional restrictions – You may not apply legal terms that legally restrict others from doing anything the licence permits.
- No warranties are given. The license may not give you all of the permissions necessary for you intended use. For example other rights such as publicity, privacy, or moral rights may limit how you use the material.
Disclaimer

Related Articles

Tractor Steering Evaluation
Contributor Andrew Chapman carries out a steering evaluation referencing IH Bradford built tractors.

Tractor Steering Overhaul Part 1
Contributor Andrew Chapman compares the various methods for splitting swivel joints on steering overhauls.

Tractor Steering Overhaul Part 3
This
article is based on rebuilding the front axle pivot pin and bushes on Bradford
built International Harvester B275, B414 and 434 tractors. The design of the
parts are however similar to those on many tractors of the period and so should
be of general use

Tractor Steering Overhaul Part 4
The final article in the 'Steering Overhaul' series by contributor Andrew Chapman. This article focuses primarily on steering boxes fitted to Bradford built International Harvester tractors.

Ferguson TED20 - Stripping Front Wheel Hubs - Video Tutorial
Ferguson TED20 - Stripping Front Wheel Hubs - Video Tutorial. In this video Gordon continues with the strip-down of the front axle moving on to strip the front wheel hubs and remove the spindle.

Ferguson TED20 - Rebuilding Front Wheel Hubs - Video Tutorial
In this video contributor Gordon runs through rebuilding the front wheel hubs on his TED20. The front wheel hubs connect the wheels to the tractor to enable you to drive the wheels and to swivel so that the tractor can be steered.

Ferguson TED20 - Removing The Steering Box - Video Tutorial
The steering box contains the gears that transmit the driver's steering movements to the steering linkage that turns the wheels. In this video Gordon investigates steering issues on his TED20 - part 1 follows the step-by-step removal of the steering box.
Related Products


