Tractor Steering Overhaul Part 1

Steering Overhaul Part 1 – Splitting Swivel Joints
While old hands will have their own tried and tested ways to split these joints, the following may be of help to those just starting out.
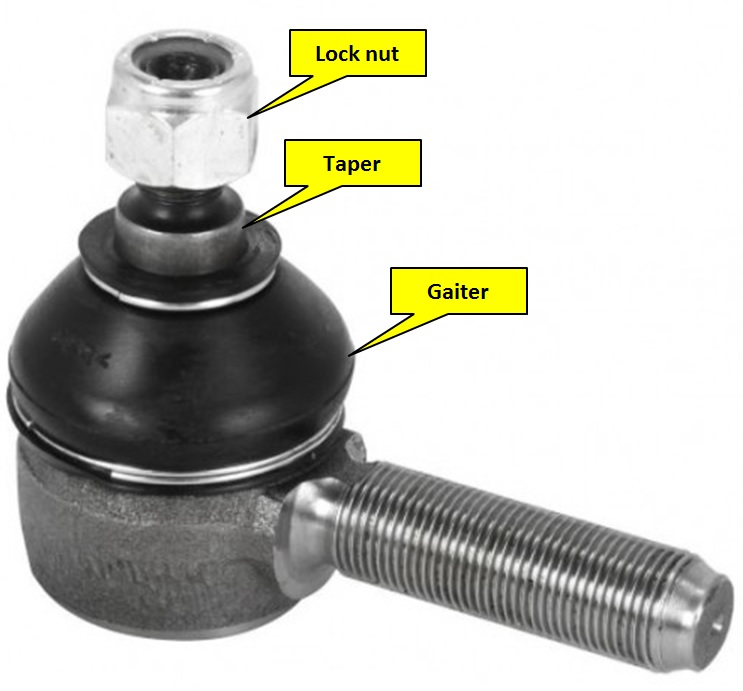
This picture shows a typical swivel joint and its key parts. The lock nut is screwed onto the threaded extension of the taper and tightens the taper into one part (e.g. the drag link) and stops that part of the joint turning. This tapered joint is the one that has to be split. The body with the long thread is screwed into the connecting part (e.g. the drag link).
Hidden by the gaiter is a spherical joint. The first thing therefore to realise is that to tighten or slacken the lock nut the only thing stopping the taper and its thread turning is friction in the taper’s mating socket. If the lock nut and/or thread are damaged and we release the taper, it will not be possible to further undo the nut.
So, before trying to release the taper, always ensure that the nut has been freed and will undo fully by finger pressure only. This may mean taking the nut off, lubricating the thread and putting it on and off a few times. This will make life much easier later.
Splitting Tools
There are a variety of splitting tools on the market and at least one novel alternative, so here are the ones used personally.
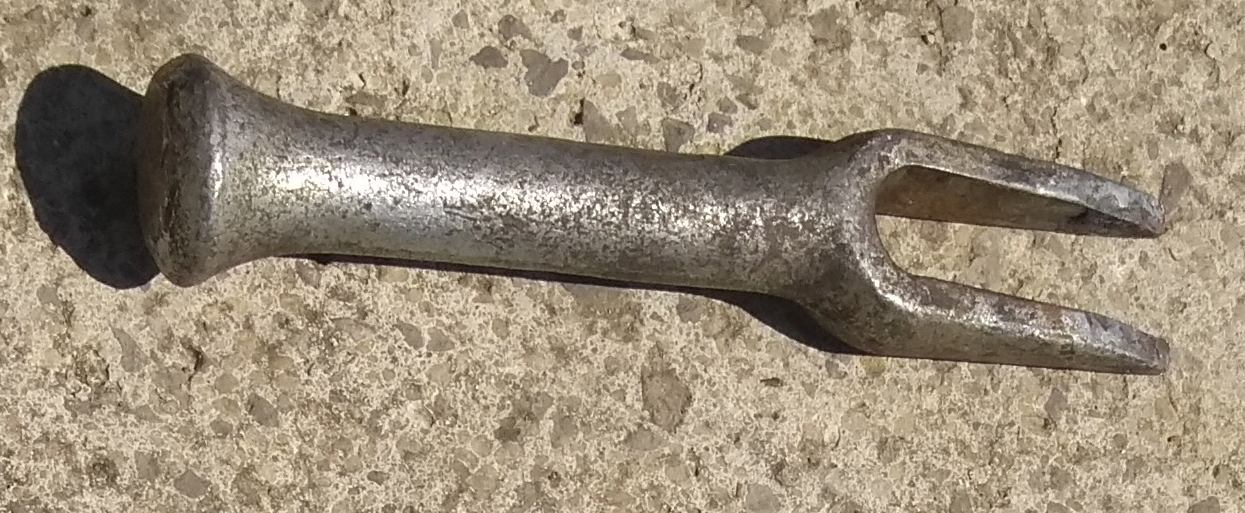
Fork Splitter
I’ve used this particular tool for over 40 years. The nut is freed, the fork is placed between the top of the gaiter and the arm holding the joint, a heavy whack with the hammer on the end of the tool (sometimes several) and the joint should split.
There are however two significant negatives when using this tool:
1. Quite a lot of force is applied to the arm holding the joint. This is normally ok but in some cases may be a little too brutal.
2. More importantly if the joint is to be reused, in most cases this tool will damage the gaiter and a new gaiter will be needed.
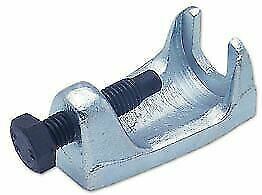
Cup Separator
This tool clamps with the bolt acting on the joint’s nut or thread and the cupped fork fits under the arm holding the joint. The forces with this tool are therefore restricted to just squeezing the arm around the taper. That said, there are also a couple of negatives with this tool:
1. The cup shape can be rather restrictive on which joints it will fit so it may be impossible to get the bolt acting straight on the joints nut or thread.
2. The tool’s bolt screws directly onto the lock nut or taper’s thread and can easily damage them making it difficult to remove the nut or reuse the joint. Some of this can be reduced by using a flat piece of steel between the two.
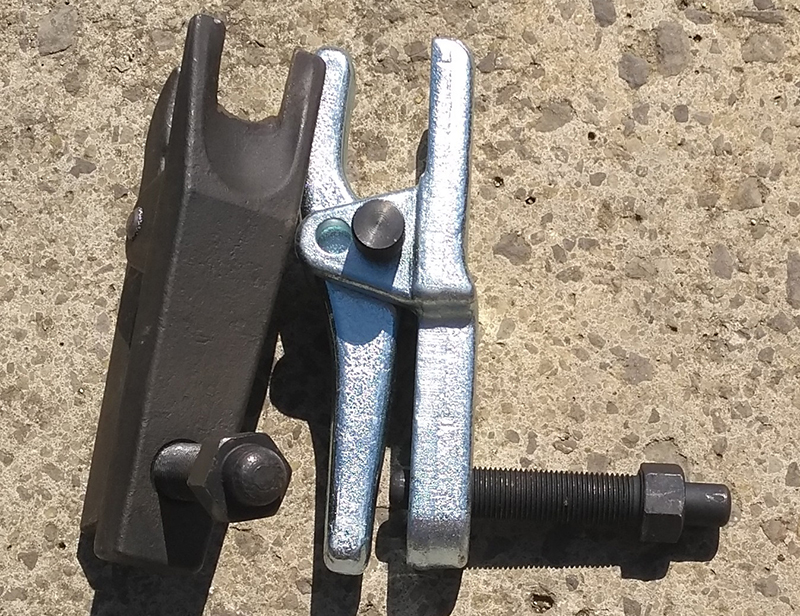
Scissors Type
This is one of my favoured solutions. The black unit has been modified to have a wider jaw slot to fit a difficult joint on a car. The silver one is wider opening and can be adjusted with two different pivot points so will remove physically larger joints.
This type of tool is similar in action to the cup type but has the advantage of longer reach and the fact that the adjusting screw acts on the tool with a flat face pushing on the swivel joint’s nut or thread. It is therefore much less likely to damage the joint being removed.
It is also worth mentioning with both this and the cup type tool when tightening the adjusting bolt hard, if the joint doesn’t break, a sharp tap on the bolt head with a hammer will often jolt it free.
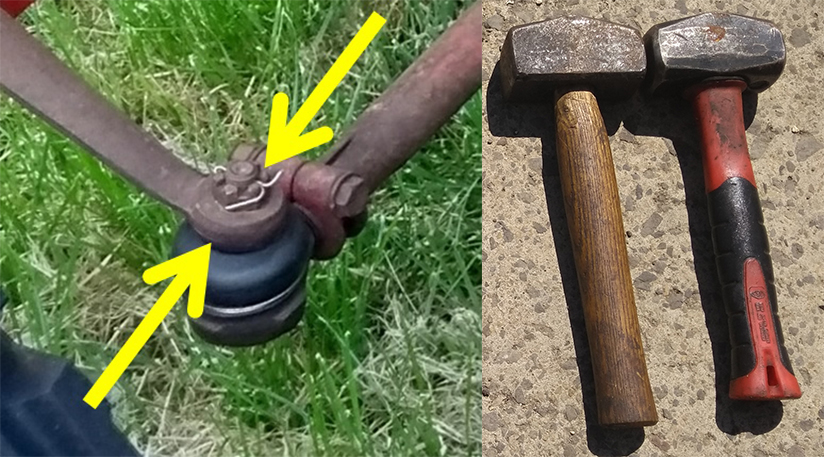
Two Hammers
This is a less obvious method but, once the knack has been learned and subject to room to swing the hammers, can be very effective.
The two hammers are simultaneously swung at opposite sides of the arm holding the taper as shown by the arrows in this picture.
The action deforms the conical shapes making then oval rather than circular in section… and then they spring back. When they are oval they aren’t making contact with the swivel joint’s entire taper surface and the vibration also helps loosen the taper too. Sometimes it takes a few whacks, possibly at slightly different radial positions, but normally works.
Two advantages here are that the hammers are already in the toolbox and there is no risk of damage to the gaiter. The negative is that it damages the paintwork on the holding arm.
ARTICLE CONTRIBUTED BY ANDREW CHAPMAN
© ANDREW CHAPMAN & ANGLO AGRIPARTS LTD


Licence Terms
You are free to: Share, copy & redistribute the material in original format for any purpose as long as you follow the license terms below:
- Attribution – you must give appropriate credit and provide a link to the original article in a reasonable and visible manner
- You may not in any way suggest that the licensor endorses you or your use.
- No Derivatives – The material must be distributed in full, including disclaimer, you may not distribute or share modified material.
- No additional restrictions – You may not apply legal terms that legally restrict others from doing anything the licence permits.
- No warranties are given. The license may not give you all of the permissions necessary for you intended use. For example other rights such as publicity, privacy, or moral rights may limit how you use the material.
Disclaimer

Related Articles

Tractor Steering Evaluation
Contributor Andrew Chapman carries out a steering evaluation referencing IH Bradford built tractors.

Tractor Steering Overhaul Part 2
Part 2 of Andrew Chapman's steering overhaul review. This article is based on rebuilding the steering knuckles and hubs on Bradford built International Harvester B275, B414 and 434 tractors.

Tractor Steering Overhaul Part 3
This
article is based on rebuilding the front axle pivot pin and bushes on Bradford
built International Harvester B275, B414 and 434 tractors. The design of the
parts are however similar to those on many tractors of the period and so should
be of general use

Tractor Steering Overhaul Part 4
The final article in the 'Steering Overhaul' series by contributor Andrew Chapman. This article focuses primarily on steering boxes fitted to Bradford built International Harvester tractors.

Ferguson TED20 - Removing The Steering Box - Video Tutorial
The steering box contains the gears that transmit the driver's steering movements to the steering linkage that turns the wheels. In this video Gordon investigates steering issues on his TED20 - part 1 follows the step-by-step removal of the steering box.